| |
In lugnet.trains, Ludo Soete wrote:
Now that is what I call “out of the box” thinking.
Tommy Armstrong
|
|
| |
In lugnet.trains, Tommy Armstrong wrote:
| |
In lugnet.trains, Ludo Soete wrote:
Now that is what I call “out of the box” thinking.
Tommy Armstrong
|
I covered my 7996 with copper foil tape that I found at Hobby Lobby in their
stained glass section. They offer several different widths, all about $5 a roll
(which is about 30m of the tape - plenty to do 7996. I was concerned about
tinning the copper because I thought that the soldering iron might melt things,
but it sounds like that is not going to be an issue, from Ludo’s findings.
The copper tape for stained glass work does very well and conforms to surfaces
especially well. I used the side of a pen as a burnishing tool to smooth out
the surface of the tape after application. I found that the foiling process
took quite a few hours. But for foiling a simpler track geometry, like a
straight track, it would be pretty quick - 15 minutes or so.
Ludo - why did you use 60/40 lead solder specifically? Would lead-free solder
work as well? (aside from being more expensive) Naturally I’d like to follow
that approach if possible since LEGO bricks and children often come into
contact.
-Jordan
|
|
| |
In lugnet.trains, Jordan Schwarz wrote:
| |
In lugnet.trains, Tommy Armstrong wrote:
| |
In lugnet.trains, Ludo Soete wrote:
Now that is what I call “out of the box” thinking.
Tommy Armstrong
|
I covered my 7996 with copper foil tape that I found at Hobby Lobby in their
stained glass section. They offer several different widths, all about $5 a
roll (which is about 30m of the tape - plenty to do 7996. I was concerned
about tinning the copper because I thought that the soldering iron might melt
things, but it sounds like that is not going to be an issue, from Ludo’s
findings.
The copper tape for stained glass work does very well and conforms to
surfaces especially well. I used the side of a pen as a burnishing tool to
smooth out the surface of the tape after application. I found that the
foiling process took quite a few hours. But for foiling a simpler track
geometry, like a straight track, it would be pretty quick - 15 minutes or so.
Ludo - why did you use 60/40 lead solder specifically? Would lead-free
solder work as well?
|
Why shoudn’t this work?
Lead-free solder needs a higher soldering iron temperture, keep this in mind,
but it can be used.
Why i did use the 60/40 lead solder is that i don’t have lead-free solder at
home yet.
Its intention was also to figure out if the copper foil would hold on the
plastic rail and see if it was possible to use it.
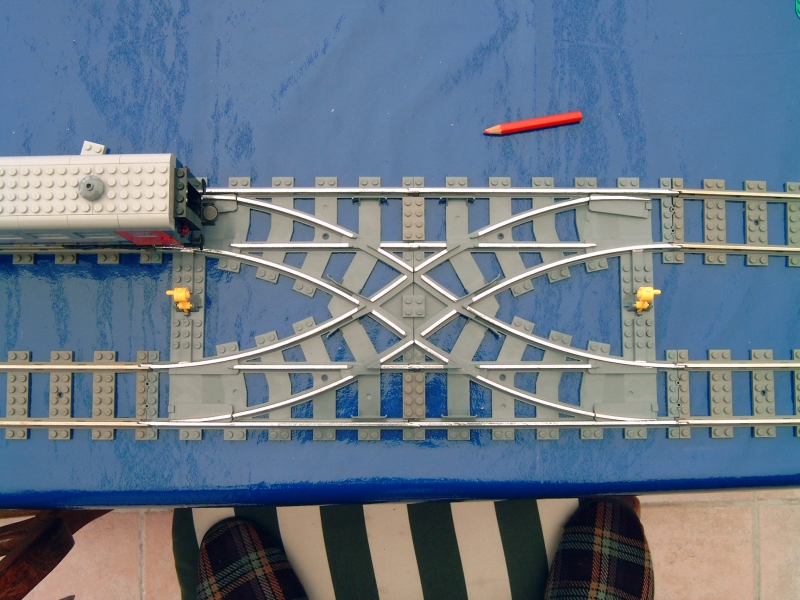
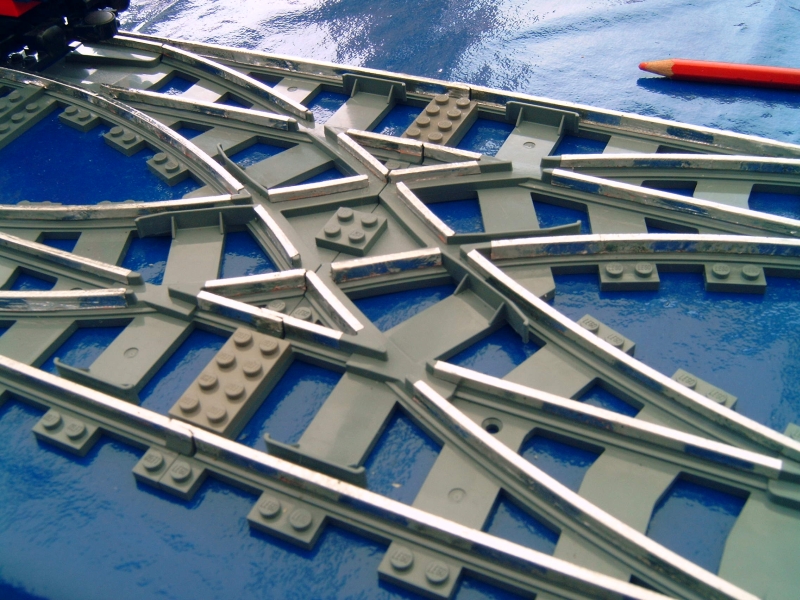
The way i placed the wires between the different metallised pieces doesn’t make
it possible to run 2 trains on each track with separate regulators.
Every rail is electrically connected together. See picture.
So i need to check where to cut the current so that it’s possible to run 2
trains with a separate regulator.
You have also to know that i tinned the copper foil *** before *** i applied it
to the plastic rails, otherwise, you can melt the plastic rail if it becomes to
hot, esspecially with lead-free solder!
I might considder to order a pre-tinned copper tape (foil) as sample and try
this one too, no more problems with lead, and a smoother surface.
| |
(aside from being more expensive) Naturally I’d like to
follow that approach if possible since LEGO bricks and children often come
into contact.
|
You are absolutely right on this one!
Ludo
|
|
| |
Does anyone have a picture or so of the internals of points? I need to but the
switch part of all four points to “turning” since I want to use memory wire on
it.
|
|
| |
In lugnet.trains, Jordan Schwarz wrote:
| |
The copper tape for stained glass work does very well and conforms to
surfaces especially well. I used the side of a pen as a burnishing tool to
smooth out the surface of the tape after application. I found that the
foiling process took quite a few hours. But for foiling a simpler track
geometry, like a straight track, it would be pretty quick - 15 minutes or so.
|
I went to a local stained glass studio and picked up a roll of Venture Tape
Silvered Copper Foil last night. The widest the shop had was 1/4” so that is
what I got. The tape is availible in other widths, and if they had the 3/8”
wide, I would have gotten that. I paid $16 for a 33 yard roll. The tape is 1.5
mils thick. You can get it online for less not counting shipping, but I could
not wait.
I did one peice of RC straight track. It was easy to put on and looks pretty
good. A made a small loop with that peice and regular track. It conducted the
ppwer well - both to the moter and to the track on eithe side. I ran a train
for abou two hours and did not see any noticable wear. The true test will be a
weekend train show.
I will try to post some pics this weekend.
Bob
|
|
| |
In lugnet.trains, Johan Korten wrote:
> Does anyone have a picture or so of the internals of points? I need to but
> the switch part of all four points to "turning" since I want to use memory
> wire on it.
Hi Johan,
What exactly do you mean with " the internals of points"?
If you mean the inner side of a point when you dismount the bottom plate, then i
can help you, but only from a 9V point (2859), not from the 7996 point.
Perhaps i can place them also on Brickshelf.
Regards,
Ludo
|
|
| |
In lugnet.trains, Jordan Schwarz wrote:
| |
In lugnet.trains, Tommy Armstrong wrote:
| |
In lugnet.trains, Ludo Soete wrote:
Now that is what I call “out of the box” thinking.
Tommy Armstrong
|
I covered my 7996 with copper foil tape that I found at Hobby Lobby in their
stained glass section. They offer several different widths, all about $5 a
roll (which is about 30m of the tape - plenty to do 7996. I was concerned
about tinning the copper because I thought that the soldering iron might melt
things, but it sounds like that is not going to be an issue, from Ludo’s
findings.
The copper tape for stained glass work does very well and conforms to
surfaces especially well. I used the side of a pen as a burnishing tool to
smooth out the surface of the tape after application. I found that the
foiling process took quite a few hours. But for foiling a simpler track
geometry, like a straight track, it would be pretty quick - 15 minutes or so.
Ludo - why did you use 60/40 lead solder specifically? Would lead-free
solder work as well? (aside from being more expensive) Naturally I’d like to
follow that approach if possible since LEGO bricks and children often come
into contact.
-Jordan
|
I ran a similar experiment using 4.5v track, and repeated it with some of the RC
track. http://news.lugnet.com/trains/?n=25776 I built a oval of track with
half being new 9v track and the other foil covered RC track. I cleaned the
track with a bit of rubbing alcohol. I ran a single motor engine and a small
consist for two 8 hour shifts. It ran great, with no opens in the power
connections. After the total of 16 hours, there was some visible wear on the
tape, but not through to the copper level. I also inspected the wheels on the
engine and cars. With no noticable gunk build up.
I recomend against using foil tape that has any amount of lead in it. This will
oxidize very quikly and foul the rest of your track and the motors. Not to
mention the poisen aspect of this being spread around everywhere.
I purchased pre-tined tape from a local stain class shop. If you mess up , or
need to to remove and or replace the tape. I recomend hetting the area with a
hair dryer on low while you remove the tape. This makes it much easier, as it
loosens the adhesive.
|
|
| |
For some reason it did not post my reply yesterday.
I want to automate the points. I use the spring to let the tongue of the point
return to its normal state and when I wind a nylon thread or so around a axle it
will put the direction for the train in 'straight forward' position. So all the
four tongues should be in 'turning position' in order for this to work. if the
internal springs are just like the 9V version with metal track than I could just
cut the actuator in half en push one side to the left and the other to the
right, but I want to be sure before damaging the point.
|
|
|