| |
In lugnet.town, Matija Puzar wrote:
| |
In lugnet.town, Jonathan Lopes wrote:
| |
I like what I see here. Are there any more pictures available to see the
details, close-ups and other angles and all?
I feel a bit teased with only these few images.
|
Thanks :)
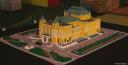
There is a bit bigger version from the same angle available on
BrickShelf. I
haven’t made any other renderings, as I would now prefer to focus on making
the brick-version and then take real photos along. But if you’re interested
in some specific details, I will be glad to make screenshots of them.
|
Ah, I’m sorry. I thought there was an existing brick version already. No need
to spend time on the screen shots. Build! :o)
I’ll be patient.
I greatly look forward to the brick-built version.
Best,
Jonathan
|
|
| |
In lugnet.town, Jonathan Lopes wrote:
| |
Ah, I’m sorry. I thought there was an existing brick version already. No
need to spend time on the screen shots. Build! :o)
I’ll be patient.
|
Knock knock... still there? ;)
So, the first version is finally built (and I must say I’m more than glad
about that period being over). It had become “a bit” exhausting after a
while, but I think it was worth it.
To William, re “I hope it comes together in brick form without any surprises
:)”, well of course there were surprises... but isn’t that part of the fun? :)
The worst “surprise” was that I actually managed to run out of some crucial
parts, but what was even more surprising was that there were only a few types
and a few parts, so I used the classical cpt. Kirk’s solution - I compensated.
I also had to take some tough decisions, and in the end a few bricks had to be
sacrificed (I ask for forgiveness from those who scored high on the purity
test, but it was for a greater good).
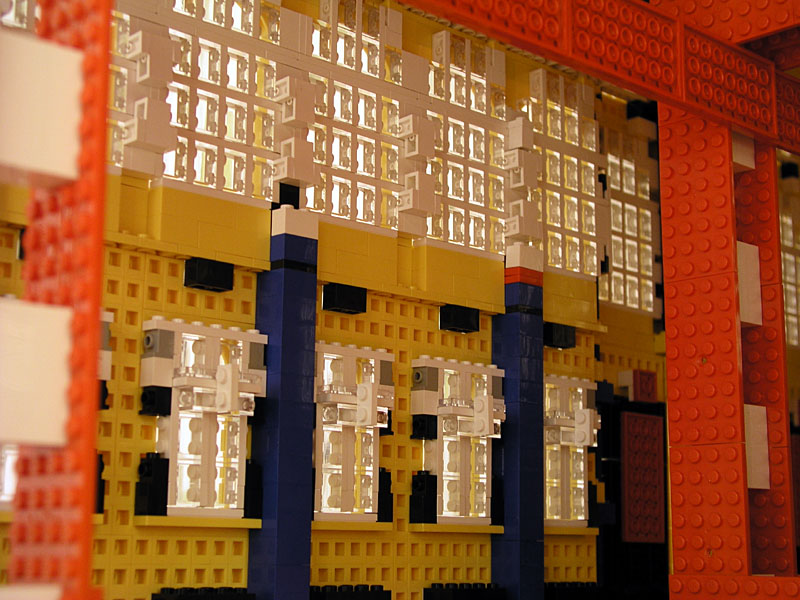
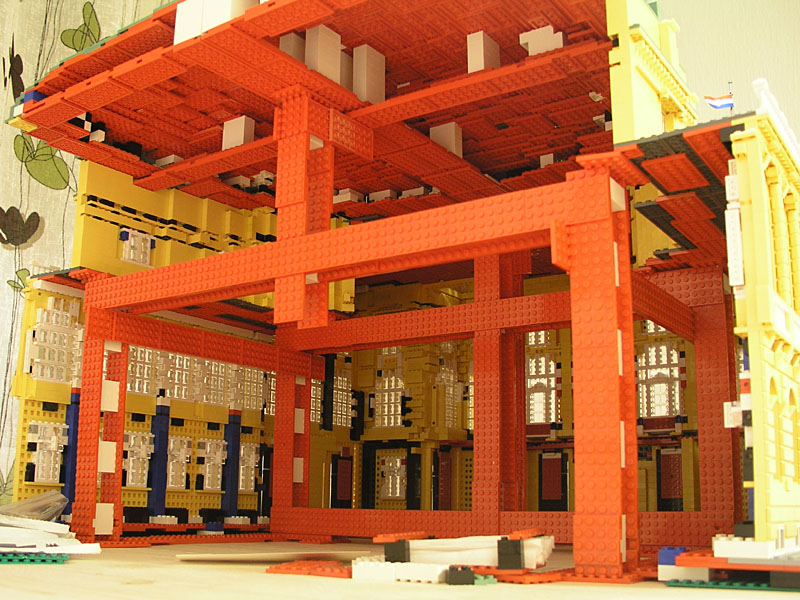
People were wondering about the internal structure, so I put out a few
pictures of that too (please do come with suggestions if you see something
that is clearly too dangerous and could fall apart any minute, I am not an
architect :)).

 (gallery)
Unfortunately, the model is very dependent on the base being as perfect as
possible, something mine isn’t, and as a result the roof on the back is very
tense. I am still wondering how I’ll manage to place it in the middle of a
layout, unless it is the first thing to be set up and it doesn’t have to be
moved afterwards. How do you guys do it on shows?
Cheers,
Matija
|
|
| |
In lugnet.town, Matija Puzar wrote:
| |
Unfortunately, the model is very dependent on the base being as perfect as
possible, something mine isn’t, and as a result the roof on the back is very
tense. I am still wondering how I’ll manage to place it in the middle of a
layout, unless it is the first thing to be set up and it doesn’t have to be
moved afterwards. How do you guys do it on shows?
|
Hi Matija,
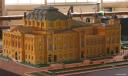
I also was following up your updates in the brickshelf gallery on the HNK
building. And right from the first CAD file I saw I must addmit that this
building is absolutly fantastic. It’s a very challenging building to convert it
into a LEGO model. But you’ve done a great job, both in CAD and in BRICKS!
Larger components (like the various domes) and small details (like the upside
down use of “rocket-noses” in white for lights) are brilliant.
Back to your question. It took me a while to find a stable way to build modular
large buildings which could be transported easily and are stable on various
kinds of tables. As I start my buildings somewhere at an iconic part and mostly
not at the base it’s quite a challenge to add a stable base later.
But to be able to transport and easy set up the model, a modular concept and a
good base is necessary. While building don’t worry about not connecting
everything with everything. Try to think of reasonable modules which could be
easly combined with some Technic pins or axles in 1x2 brick with axle hole.
http://www.brickshelf.com/cgi-bin/gallery.cgi?f=204481
Here you can see the modules which I use to set up my Frauenkirche.
Your HNK was your learning experience, and next time you will think in advance
of the more stability and a modular concept if you want to transport and show
your creations at public events. And your creations are definetly worth showing
to the public and other fans!
And you might also add some more inner structures to the facade elements and
perhaps think of a base using old 32x32 street plates. Use tiles covered by
bricks to make clear where a facade module should be placed while setting up the
model.
Could you upload some more detailed pics of the dome, windows, lights and and
and and to your brickshelf gallery.
Keep on brick’in
Holger
|
|
| |
In lugnet.town, Matija Puzar wrote:
| |
In lugnet.town, Jonathan Lopes wrote:
| |
Ah, I’m sorry. I thought there was an existing brick version already. No
need to spend time on the screen shots. Build! :o)
I’ll be patient.
|
Knock knock... still there? ;)
|
Yes! A little late, but here. :o)
| |
So, the first version is finally built (and I must say I’m more than glad
about that period being over). It had become “a bit” exhausting after a
while, but I think it was worth it.
Cheers,
Matija
|
Stunning. Excellent details everywhere.
Congrats on the completion.
best,
Jonathan
|
|
| |
In lugnet.town, Holger Matthes wrote:
| |
Hi Matija,
I also was following up your updates in the brickshelf gallery on the HNK
building. And right from the first CAD file I saw I must addmit that this
building is absolutly fantastic. It’s a very challenging building to convert
it into a LEGO model. But you’ve done a great job, both in CAD and in BRICKS!
Larger components (like the various domes) and small details (like the upside
down use of “rocket-noses” in white for lights) are brilliant.
|
Thanks :)
| |
But to be able to transport and easy set up the model, a modular concept and
a good base is necessary. While building don’t worry about not connecting
everything with everything. Try to think of reasonable modules which could be
easly combined with some Technic pins or axles in 1x2 brick with axle hole.
|
The building is indeed modular, it has been designed as such because I knew
I would need to put it apart for transporting. Basically every wall section
is a separate module (details on how it is “cut” can be seen
here if someone is interested). I actually tried using Technic bricks with
pins and axles, but in the end I decided either not to connect modules at all or
to connect them using studs at a few places.
Nice photoshoot! (and model, I get stunned every time I see it)
| |
Your HNK was your learning experience, and next time you will think in
advance of the more stability and a modular concept if you want to transport
and show your creations at public events. And your creations are definetly
worth showing to the public and other fans!
|
Thanks, that’s why I make them (I definitely do not have place for them home :)
) and it is always nice to see that people like them .
| |
And you might also add some more inner structures to the facade elements and
perhaps think of a base using old 32x32 street plates. Use tiles covered by
bricks to make clear where a facade module should be placed while setting up
the model.
|
As mentioned above, I did think in advance regarding transport. The building
seems also to be stable, although it never hurts to add more structure.
Side note: the two domes, being very heavy, have own stands.
Old street plates are exactly what I had planned to use (if you look at the
CAD picture you’ll see them around the model). Another plan is to expand it
with grass and flowers, like it is done in reality... but we’ll see about that.
| |
Could you upload some more detailed pics of the dome, windows, lights and and
and and to your brickshelf gallery.
|
Done (available after moderation, or immediately from the MOCpages gallery).
I also made some comparison photos between the real building and the
model, it took a while to find the right angles and rotate the model in a
not-so-wide kitchen :)
|
|
|