| |
In lugnet.robotics.rcx, Mark Bellis wrote:
> You can use four touch sensors per input port on the RCX.
>
> The Cybermaster touch sensors have resistors in parallel, and this is how the
> Cybermaster knows which implement is attached to the tracked robot.
>
> It uses its sensor input as a temperature sensor reader in order to read the
> resistance value on the input, which is different for each switch.
>
> If you use the same method on the RCX (after enabling the temperature sensor in
> the advanced control page) you can use four touch sensors like this:
> Put resistors of 82k, 56k, 47k and 39k in series with the four switches.
>
> Cut in half some short 9Volt leads and put 12Volt plugs on them. Then use choc
> block (barrier strip) for the resistor assembly, with 1/0.6 bell wire protruding
> - shove these wires into the middle of the 12V plug pins. One wire goes to the
> RCX port and one to each switch.
>
> Alternatively use Veroboard for a tidier solution, but I haven't got round to it
> yet.
>
> You can determine which of the four (and every combination of 2, 3 or 4 of them)
> has been triggered by testing for temperature sensor values. This is great for
> robots with multiple bumpers.
>
> I picked the resistor values to make all combinations line up on the linear part
> of the value vs resistance graph (the linear region is in the middle).
>
> Of course you can also put a light sensor in parallel as is done on the soccer
> robots. So now you have 15 sensors on your RCX!!
>
> Happy sensing!
>
> Mark Bellis
LEGO purists use LEGO light bricks as resistors.
I created potentiometer bricks, where the resistance is variable for each brick.
Two stacks of 4 potentiometer bricks can be seen to the left of the RCX. In
this case each stack puts the switches and resistors in series. To the left of
the potentiometer brick stack is a 16 key keyboard that has for row touch
sensors and four column touch sensors. The keyboard requires to RCX input
ports.
The potentiometers in the potentiometer bricks are the rectangular green boxes
hanging off the sides of the resistor stack. The potentiometers are 10 turn,
10K ohms, so you get a *lot* of resistance control.
The potentiometer brick is a sandwich of 2x2 electrical plates on the top and
bottom, with a regular 2x2 plate in between. The potentiometer leads are
connected to the top and bottom electrical plates.
The potentiometer bricks can be used to create series, parallel or series
parallel circuits. In my experience series gives you better resolution in the
analog input range of the RCX.
I'll have to check, but I'm pretty sure that I do not put the sensor ports into
temperature mode. Instead I used raw touch sensor readings which gives you a
range of values from 0 to 1023, giving us the maximum sensor reading resolution.
Kevin
|
|
| |
> But as a purist you can use the cybermaster sensors to multiplex three
> inputs (http://www.loria.fr/~stuber/lego/cybermaster-touchsensors.html).
Hi Jürgen,
I have tried this method too, and as you say in your text, it is plagued by the
rubber contacts whose value goes down as more pressure is applied to the switch.
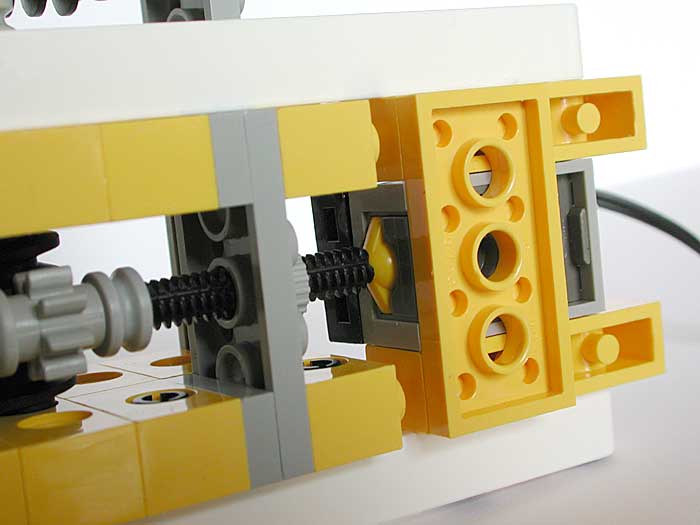
I measured resistance of several touch sensors while applying a very progressive
pressure, using a two stages worm screw down gearing driving a threaded axle
pushing sensor button. At the very beginning of contact, resistance is as high
as 10000 ohms, then go down very rapidly and reach an asymptote at about 500
ohms (exact value varies between touch sensors).
I'll post soon the results.
As the difference between switches resistances is only 2000 ohms, false readings
will happen (and I even doubt that double reading will cure the problem in
several mechanical designs).
But using only yellow and white sensors with 5k difference should be almost safe
- better than nothing !
Philo
www.philohome.com
|
|
| |
Here is a chart showing the variation of contact resistance of several touch
sensors while pressing button very progressively.
- There are huge differences between various sensor
- Lightly pressed touch sensors have contact resistance in the 2 to 5 KOhms range.
- Fully depressed resistance varies (for the samples I measured) between 400 and 560 Ohms
Photographs of the test contraption:
Top view
Touch sensor
close-up
Philo
|
|
|