|
|
| |
Has anyone managed to crack open (without damaging the parts) one of the new 2x4
minifig-magnet bricks? I noticed that they were held together with a couple
Torx screws, so I bought a precision Torx set (I think it took a T6) and removed
the screws. The back, however, does not just pop off when you take the screws
out. I tried a second brick just to be sure it wasn't a fluke, but it looks
like they are _REALLY_ serious about preventing accidents that could lead to
lawsuits. My take on it is that the screws are in there to prevent the back
from accidentally popping open and spilling the tasty magnetic treats out, but
the back clips into place so even if some mechanically-minded child does manage
to get the screws out, it'll still keep the magnets secured inside. But I'd
like to get one open just to how feasible it would be to swap some rare-earth
magnets in for the rather wimpy ones they come with. So, has anyone succeeded
in prying one open without destroying it?
|
|
| |
In lugnet.trains, Mark Bellis wrote:
| |
In lugnet.trains, Dave Sterling wrote:
| |
In lugnet.trains, Jonathan Wilson wrote:
| |
We all want new larger radius curves and other things. Also, Big Ben
Bricks, BrickArms and others have been able to successfully mold and sell
new custom parts.
Has anyone ever considered extending this and doing some kind of molding of
new track pieces ourselves? Has anyone ever done some investigation of how
much it would cost for a mold for a larger radius curve or other new track
shapes?
Would people (and e.g. train clubs) be willing to donate towards the
(potentially high) costs for producing such a mold? (my guess is that once
the mold is made, the actual costs of producing the parts would not be huge
in bulk volumes)
|
I think some people have investigated this in the past for 9V and found that
the cost was to great to warrant proceeding. That said, it is probably more
feasible for the ‘RC Track’ since you would not have to deal with the metal
rails.
However, it appears that LEGO might be fixing the track geometry issue with
this nifty new element.
http://www.flickr.com/photos/jastermereel08/3335067544/in/pool-legotrains

Only time will tell though.
-Dave
ToT-LUG
|
With a little modding to the internal curves of the parts shown in the
picture above, it might be possible to support ballast from underneath the
track like this:
http://www.brickshelf.com/gallery/mbellis/Trains/Ballasting-Track/ft_ballast_m_bellis.jpg
Mark
|
Here is a further picture, showing 64 flexible track pieces in set 8867.
The gaps between the two halves of each track piece are smaller than in the
previous picture, and there are fewer studs for attaching ballast:
http://www.aquazona.cz/smf/download/file.php?id=1729&mode=view
To ballast it means either a bit more modding (4 holes punched per piece, a bit
laborious for 1000 pieces in a layout) or a compromise on ballast width. Take
two 1x4 plate hinges per track piece, one black and one bley or dark bley. Swap
the halves so that each hinge is half black. Attach the hinges to the two studs
in the middle of each track piece. It’s better if the hinges face the inside of
the curve because the hinge can be opened a bit in some cases. This needs two
curves on the layout, each curve using the left halves of one hinge colour and
the right halves of the other colour. This will provide alternate black and
grey stripes to represent sleepers and ballast. Unfortunately the ballast will
not be the full width between the rails but it does have the advantage of not
needing any support from below the track.
I first used bi-colour hinges in ballast on the crossover:
http://www.brickshelf.com/cgi-bin/gallery.cgi?i=3277249
Unfortunately the hinges are not yet available in black, bley or dark bley in
PaB online.
Alternatives with clip plates and rods might work, giving a wider ballast
between the rails, and perhaps enhancing the randomness because grey and black
colours would merge more. It might not be quite so easy to show clear sleepers
though, unless grey clips would look like a small ballast spillage on top of
them, which is OK in the middle 2ft between the rails.
Mark
|
|
| |
Well here is a little guy I have been working on that I thought you guys would
like to see:
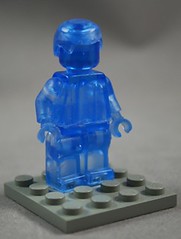
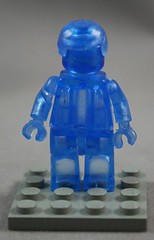
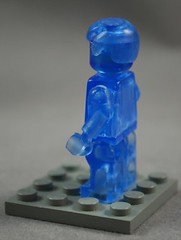
Enjoy!
Kaminoan
|
|
| |
In lugnet.trains, Ondrew Hartigan wrote:
> In lugnet.trains, Scott Wardlaw wrote:
> > > The real broblem with the 7996, wether you metalize it or not is the linked
> > > switch controls. My next project is to split the controlls and add solenoids for
> >
> > I wish that I had read this a few months ago (when I should have). I just
> > bought a 7996 with the intention to convert it to 9V.
> >
> > I am very disapointed that you can not have both of the parallel straights
> > switched to go straight at the same time. The switching only allows for one to
> > be straight and the other must curve.
> >
> > I'd be happy to know if you have a good method of splitting the controls and
> > adding solenoids!
> >
> > Does anyone else have experience with splitting the 7996 controls, or adding
> > solenoids to a regular 9v switching point?
> >
> > Thanks,
> > Scott
>
> splitting the controls for the doubble crossover can be done in a couple of
> ways. as soon as i get my hands on a set i will write up some instructions for
> everyone.
>
> as for selenoids there really is no need. automating 9v/rc switches is fairly
> straight forward. see:
> http://www.brickshelf.com/cgi-bin/gallery.cgi?f=109777&n=47 see photos that
> start with a "z" also there are literaly probably 100+ solutions to automate
> all you have to do is look.
> ondrew
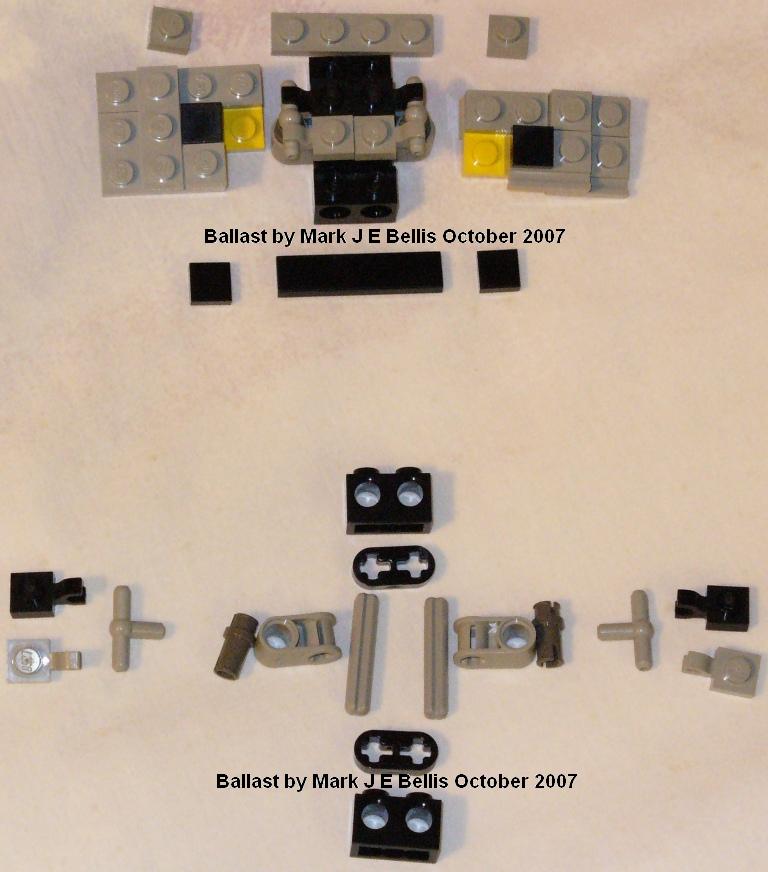
I have altered the crossover controls to provide for an all-straight state by
tweaking the springs in the switching rails.
I have also motorized the crossover in such a way that it can be set straight,
TL-BR or BL-TR with two switches (both pneumatic!).
My solution needs just 8 plates below track level in order for there to be no
obstructions above ground, so that larger rail vehicles (8+ wide and 8mm scale)
can use the crossover without grounding or hitting the mechanism.
I ballasted the crossover while I was at it, so that it fits with my layout
ballast scheme.
Pictures here: http://www.brickshelf.com/cgi-bin/gallery.cgi?f=147934
Instructions for building it:
http://www.brickshelf.com/gallery/mbellis/Technic/Pneumatics/Pneumo-Switch-Points/crossover_info.txt
Mark
=============================================================================
Mark J E Bellis 8mm scale LEGO trains
|
|
| |
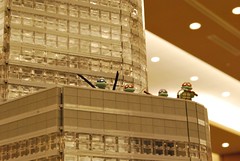
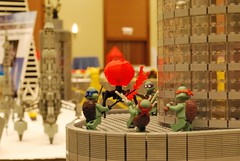
Adam Reed Tucker kindly allow me to use his buildings to show case my turtles.
In the second photo they are battling one of Nannan Zhang’s Monsters.
Brickworld was tons of fun. By the way, the photos are links to Flickr
galleries where more images can be found.
Enjoy
Kam
|
|
| |
Well I made my Hellboy figures for Brickworld and figured I would share them all
with you. Here is the clan, enjoy:
Hellboy Figures

Photo is link to Flickr Gallery where all can be found!!!
Just waiting on the hair piece to complete the main character.
Kam
|
|
| |
In lugnet.parts.mod, Brian Davis wrote:
> In lugnet.parts.mod, Chris Magno wrote:
>
> > My guess is either a wiggle light(1), or a solar tracker to
> > heat "something."
>
> Hmm, I like both of those, but my idea is/was closer to the first. Not to cast a
> light, but to reflect an image: have a camera rigidly mounted (so the heavy
> stuff doesn't need to move), with a rotating mirror at 45° in front of it on a
> turntable (turntable facing the camera lens, not perpendicular to it). Depending
> on how that mirror rotates you could look in various directions, sort of like a
> lighthouse with a rotating mirror set above the lamp.
Sounds like an interesting idea.
>
> Hey, it's winter down here and you folks north of the border keep sending down
> cold fronts - what do you expect me to do, I'm going crazy down here and
> seriously thinking about LEGO icebreakers/icecrawlers.
We keep sending down the cold fronts in direct proportion to the atmospherics we
get from the coal burning plants in Ohio
http://www.electricityforum.com/news/jun05/USsmoginOntario.html
Fair is fair
;)
Chris
|
|
| |
In lugnet.parts.mod, Chris Magno wrote:
> My guess is either a wiggle light(1), or a solar tracker to
> heat "something."
Hmm, I like both of those, but my idea is/was closer to the first. Not to cast a
light, but to reflect an image: have a camera rigidly mounted (so the heavy
stuff doesn't need to move), with a rotating mirror at 45° in front of it on a
turntable (turntable facing the camera lens, not perpendicular to it). Depending
on how that mirror rotates you could look in various directions, sort of like a
lighthouse with a rotating mirror set above the lamp.
The good news is I got the ABS glued to the mirror backing using the Stik 'N
Seal Ultra LocTite (& only cut my fingers once). The bad news is a 4" mirror
(the smallest that seems to reflect the whole image) ends up being pretty heavy
itself. Easier/lighter to rotate, but the support system needs to be more than I
originally planned. I'm not sure if I have to try a different technique or not,
but the idea might still work for a smaller camera.
Hey, it's winter down here and you folks north of the border keep sending down
cold fronts - what do you expect me to do, I'm going crazy down here and
seriously thinking about LEGO icebreakers/icecrawlers.
--
Brian Davis
|
|
| |
In lugnet.parts.mod, Brian Davis wrote:
> > But I have to ask what the hec is this for?
>
> For now, let's just say I'm thinking of taking LEGO into a whole new range of
> environments. Actually, I've had good luck playing with robots in snow and water
> lately, so you never know.
My guess is either a wiggle light(1), or a solar tracker to heat "something."
Chris
1. A Type of theatrical light used in disco's and concerts. a beam of light is
projected onto a mirror. The mirror is mounted onto X/Y stepper motors that can
reflect and move the light.
http://www.usedintelligentlighting.com/images/item_images/Cyberlight_Litho___%5B980%5D/cyber2%5B1%5D.jpg
|
|
| |
In lugnet.parts.mod, William Webb wrote:
| |
In lugnet.parts.mod, Aaron M. Sneary wrote:
| |
In lugnet.parts.mod, John Neal wrote:
| |
In lugnet.parts.mod, Rob Hendrix wrote:
| |
Has Super Glue been used very successfully keeping ABS parts bonded over
time?
|
AFAIK. Have you heard otherwise? I thought Super Glue was in the same
type glue family as MEK.
JOHN
|
No they are quite different.
MEK is not even a glue or epoxy at
all. It is rather a solvent that literally loosens the plastic molecules of
the ABS, and allows them to intertwine between bricks. Once it evaporates,
the ABS returns to a state almost the same as it’s original. MEK’d ABS is
slightly more brittle than the original casting.
I strongly recommend only professionals with adequate ventilation and
handling equipment use MEK with any regularity. It has some significant
health concerns, and is being phased out of use by the LEGO company. It has
been restricted from use in the European model shops for at least the past 5
years.
Most superglues I have used are CA or Cyanoacrylate based.
| |
Per Wikipedia:
Generally, cyanoacrylate is an acrylic resin which rapidly polymerises in
| |
the presence of water (specifically hydroxide ions), forming long, strong
chains, joining the bonded surfaces together. Because the presence of >
|
moisture causes the glue to set, exposure to moisture in the air can cause
a
| |
tube or bottle of glue to become unusable over time. To prevent an opened
container of glue from setting before use, it must be stored in an
|
airtight > jar or bottle with a package of silica gel.
|
Except for very large, weight-bearing models, I would recommend people use
SuperGlue over MEK. No need to expose yourself to the stuff unless it’s
really necessary for it to be VERY durable.
Aaron Sneary
Former Master Model Builder
|
As Aaron States, the use of MEK was BANNED from the Lego modelshops back in
1998, and GBL was introduced. Many health issues were being presented and an
article written in the LEGO REVIEW magazine, a corporate magazine spoke about
the transition, which was needed due to the concerns in negative health
effects on employees using MEK. (Which I have a copy of)
Unfortunately or just plain negligence, some shops continued the use of MEK
even as late as 2005, when I left the modelshop. I had already started to
feel the negative effects as stated on the MSDS, and was growing intolerant
of the chemical. I STRONGLY advise NOT to use this even with ‘proper
ventilation’ the chemical evaporates very fast and is heavier than air, so it
tends to settle down in the room. That is why an extractor is also placed on
the surface of the special work tables at the modelshops.
At the modelshop in Mexico, we only had a proper shop for 2 years (under
american management), then when moving to a new office, the system was
reinstalled, but after a third move, the extraction system was never
reinstalled, and the new people that were glueing models indoors with MEK and
without ventilation were never informed of the irreversible health damage,
which was many times discussed by the people making the decisions. It was
usually said ” This is not stuff you want your kids to be around” as a
selling line to get funding for the expensive extraction system set up in
1998 Unfortunately when trying to help this individuals, I was immediately
sentenced to “shut the hell up, and feel the consequences” and mind my own
business. I guess that if the big wheels had their kids doing the glueing,
they would take the proper precautions to ensure health and safety, but cheap
labor is always easily replaced.
In talks to more than a handful of danish builders, MEK did severe damage to
the health of the first generations of model builders. But that is a very
well kept secret story.
DON’T USE MEK if you love yourself and life.
|
There is of course an alternative, if you want to put up with the hassle. Buy a
good respirator with a cartridges designed to filter out the MEK. But you need
to be careful. You need to make sure that the cartridges are fresh as once in
use for a certain amount of time, they of course lose their
adsorbtion/absorbtion capabilility. Probably the best way to do it would be to
set up a lot of glueing to be done, buy a new cartridge, and then at the end of
the session throw away and begin the next session with a new one. Some of the
more expensive ones are reasonably comfortable. They WILL protect you as long as
you use in prescribed manner. There are many cartridges out there--each with
specific properties for specific chemicals. Make sure the ones you buy are
specifically state protectiong for MEK. Usually an organic vapor cartridge. Make
sure OSHA approved. 3M makes a good one as do a few other companies.
The instant you begin to smell the MEK--and just a small concentration can be
perceived--change cartridges. If you want to use in multiple sessions and are
confident the cartridge is not used up,unscrew the cartridge and store in a zip
lock bag. If one reads the extensive instructions and actually follows them, on
will be adequately protected. One should also of course provide good ventilation
to expel the fumes from the work area.
Do not skimp and buy a good one. With the new silicone rubbers that have been
developed, there are some that are reasonably comfortable. Comfort is number one
concern (after adequate protection) so one does not get fed up and say to heck
with it.
Most cartridges will tell you the number of hours that they will last (based on
the concentration of the contaminant>
Tommy ARmstrong
The BrickEngraver
www.brickegraver.com
|
|
|