| |
|
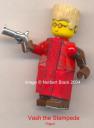
Creating custom fabric elements for Lego minifigures
Norbert Black, February 2005
For my various custom minifigures, I’ve needed to make
a variety of fabric elements. Lego produces capes in
several colours, but what if you want a shade not
available? My answer was to produce my own! The
techniques appropriate for capes are also useful for
skirts, dresses, long coats and many other things, too.
Let your imagination be your guide!
A two-tone opera cape:


A pleated skirt:

A trenchcoat:
A) Choosing material
My fabric elements are made from a thin, finely-woven
synthetic fabric that’s called “broadcloth” in the
fabric store where I shop. I think the material is
polyester. Fortunately, the cloth is the cheapest in
the store, so it doesn’t cost much (less than $1) to
buy a 10 cm. swatch and experiment a bit. A bolt of
broadcloth fabric will probably be something like 120
cm. wide, so you’ll have lots of material to spare
from your 10x120 cm. strip if your first attempts are
not perfect. :)
One very important thing to remember is that you want
to get cloth with as fine a weave as possible. It’s
worth shopping around if you have a number of stores in
your area that sell fabric. Broadcloth can be tightly
woven, with a very high threads-per-centimetre count,
or rather loose. The only time a low thread-count is
appropriate is for making clothes for your castle
peasants - miniature burlap anyone? :)
Some minifig customizers use paper to create capes and
so forth. This works, but the results don’t look much
like real Lego elements, and they’re more fragile, too.
Using the methods and materials described in this
document, you can make elements that look good and
stand up to wear and tear, too.
B) Preparing the material for use
Before you can cut your new fabric into shape, it needs
to be treated to stop it from fraying. When I buy a
new strip of material, I cut off a modest amount
(usually something like a 10 cm. square) and apply some
artist’s acrylic matte medium to stop the fabric from
unravelling.
You can buy acrylic matte medium in any decent artists’
supply store. Note that you need acrylic medium,
since it stays flexible even after drying completely,
and you want matte medium so that the fabric doesn’t
dry shiny.
To apply the medium, I take a piece of waxed paper and
lay my small piece of fabric on top of it. I then use
a 1 cm. flat brush to cover the fabric with acrylic
medium. The brand of medium I use is sufficiently
runny to soak right into the fabric. Some brands are a
little less viscous, so you may need to dilute them
slightly with water.
I try to get the fabric soaked, but not dripping wet.
Once this is achieved, I hang the material up to dry.
Leave a border of unsoaked material along one side so
that your clothes pegs don’t stick to the material!
Make sure there are no wrinkles or creases in the
fabric. If necessary, iron wrinkled fabric before
treating with acrylic medium.
The medium will be whitish in colour when wet, but will
dry clear. Even after drying, however, it will make
the fabric a shade darker, so take that into account
when choosing your fabric at the store.
Once the acrylic-soaked fabric has dried, you will find
that you can use sharp scissors to cut and trim it to
whatever shape you want. The edges will not unravel
because the threads have all been coated in plastic.
Treated fabric is slightly stiffer than raw fabric. It
will still bend easily, however. Be aware that if you
put a sharp fold in treated fabric, the crease will
stay visible. This can be useful if you want to make a
pleated skirt for a Lego minifigure. Beware - this
takes lots of patience to do...
If you’ve been lazy about ironing or careless about
hanging your fabric to dry, you may have unwanted
creases. You’re stuck with them! Start again, and
with a little bit of care and effort, you’ll eventually
have a smooth piece of fabric to use for your custom
masterpieces.
C) Techniques for painting fabric
When fabric has been sealed with acrylic medium, you
can paint upon it with acrylic paints. The paint won’t
bleed into the treated fabric as it would with raw
fabric. That makes it possible to paint straight edges
or complex designs.
Because the fabric’s surface remains irregular, you may
need to build up your painted design with several thin
coats of diluted paint. You want the paint to get
right down onto the surface of the sealed fabric, and
diluting it a bit will help this to happen.
Be patient, and add depth of colour with several thin
coats of paint. Don’t forget to put down a white
undercoat first if trying to paint a light colour over
a dark fabric. Also, be careful not to build up thick
layers of paint on the fabric - the paint may crack
when the fabric bends.
You can get a variety of effects with paint. Insignia,
stripes and coloured borders are all possible. I’ve
even created military camouflage patterns. It would
also be possible to simulate tie-died fabric, if you
needed to... :)
Of course, if you can buy fabric that’s pre-printed
with the pattern you want, that’s even easier! I’ve
found tartan, checked and striped broadcloth
occasionally over the years, and bought small samples
of each when I saw them, for use in future projects.
D) Changing colours and creating coloured linings
Another thing you can do with paint is completely
change the colour of a fabric. In cases where I could
not match a Lego colour at the fabric store, I’ve
cheated by buying the closest match and then applying a
very thin coating of acrylic paint. This was done
after the fabric was treated with acrylic medium.
You can use paint, as described above, to make a cape
with a different coloured lining. Lego themselves used
this trick for the vampire figure in the Studios movie
monster line. The problem with this method is that the
paint can through on the other side of your fabric.
I prefer to make linings by cutting identically-shaped
pieces in both colours and using acrylic medium to glue
them together. You get a much stronger colour, and so
long as the laminated item is handled carefully, it
won’t split apart.
E) Simulating exotic materials
If you used gloss acrylic medium instead of matte on
very finely woven cloth, you could get something that
looked a bit like leather. Perhaps this would be
useful for making skirts for your Lego disco customers,
or trenchcoats for your cyberpunk characters?
Actually, I’d be tempted to replace the broadcloth
fabric with thin PVC plastic, but that’s something I’ve
not yet tried in practice.
One specialized fabric I have experimented with is
“fun fur”. By choosing a fur fabric with a very finely
woven backing, and really soaking a lot of matte medium
into the backing FROM THE NON-HAIRY SIDE, I was able to
make a very impressive fur cape for one character.
In this case, soaking the fun fur’s fabric backing with
acrylic medium has to do two things: first, it stops
the backing from fraying/unravelling once cut, and
second, it glues the base of the “fur” fibres to the
fabric backing so that they don’t fall off at the edges
when you cut the fun fur.
Cutting fun fur is a very tricky exercise. Use sharp
scissors with very short blades. Once the basic shape
of your fun fur element has been cut, you may need to
trim the “fur” fibres in some areas to improve the look
of the piece.
Another exotic material is sheer fabric. This is a lot
more expensive than broadcloth, but the same basic
techniques apply for preparation and use. The only
trick is to treat the sheer fabric with very dilute
(instead of full-strength) acrylic medium.
Once you’ve applied the medium, but before you hang it
up to dry, use a paper towel to blot away most of the
medium. Try to make sure that the medium isn’t left
filling in the spaces between the fine threads of the
fabric. Full-strength acrylic medium will tend to fill
in these spaces, which is why we use it very diluted
with sheer material.
To keep the see-through look, we just want to coat the
threads, not fill in the gaps between them. If you
leave areas of fabric with filled gaps, these will show
as ugly blotches when dry. Work carefully.
You may need two or three careful treatments to prepare
sheer fabric for use with a figure. Because you’re
using diluted acrylic medium, the treated fabric has
far less strength than usual. Repeated careful
applications of diluted medium will build up protection
while keeping a see-through appearance.
The end result will still be more fragile than regular-
treated broadcloth, but the effect of a sheer cape or
skirt can be absolutely stunning. I find that look is
worth some extra care and effort.
Conclusion
Using fabric to make custom elements for your Lego
figures is easy once you’ve learned how to prepare it.
The raw materials are cheap and easy to find, so give
these techniques a try on your next figure, and you’ll
never look back! And remember, as always, I’d be
interested to see what people come up with, so post a
message to Lugnet to let me and everyone else know
where to see your creations.
|
|
Message has 3 Replies:
9 Messages in This Thread:
  ") 


- Entire Thread on One Page:
- Nested:
All | Brief | Compact | Dots
Linear:
All | Brief | Compact
|
|
|
|