| |
Hi all,
I discovered a really neat trick with POVray and GIMP yesterday that I
thought might be of interest to other CADders so I’ve written the below
tutorial.
Hope you like it and feel free to ask me questions.
Tim
Requirements:
Focal blur is a great way to make a POVray render look more realistic or
just better. Unfortunately, it is very slow, typically making the rendering
proccess order ten times slower than running a calculation without it.
Being an impatient renderer I decided to find an option that would give
me good focal blur without the expense.
The basis of this method is that povray can be used to produce a depth
map (more later) and that the focus blur plugin for GIMP simulates focal
blur really well if it is provided with a depth map. This allows us
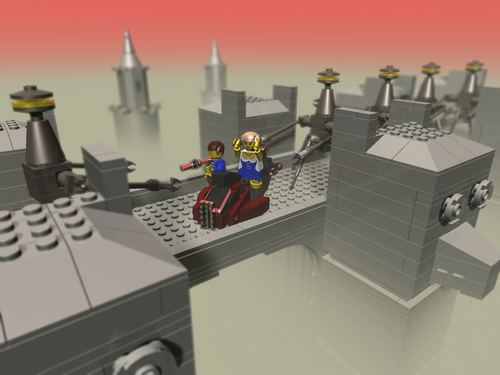
to take an image like this
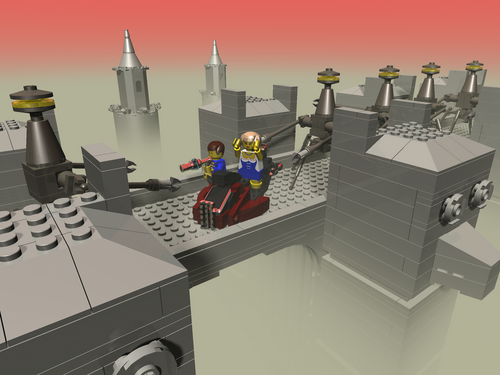
and turn it into this
while also allowing us to fiddle around with the blur after the initial
calculations making it a lot easier to remedy mistakes than having to
rerender an entire scene. Anyway, I think this is enough background and we
can move onto the actual method.
Stage 0 - centering the model
This tutorial relies on the fact that the camera is looking at somewhere
near (0,0,0). In order to ensure this is true you should make sure that
the center of your model is vaguely near there. The easy way to do this
is to temporarily drag a 1x1x5 brick into the model, position it at
(0,0,0) and drag the rest of the model around until it is vaguely
centered at the top of the brick. Then delete the brick.
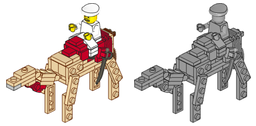
Stage 1 - making a ‘blank’ model
The first stage of making cheap focal blur is to create a ‘blank’ copy of
the model you wish to render. This is done by replacing every colour by
colour 16. You also need to be careful to replace every printed part with
a non-printed version. This should be done by hand in MLCad or LeoCAD
by first selecting all the pieces (and those in the submodels) and
changing their colour to 16, and then replacing all prints by the
non-printed original.
NB. It is very important that you make sure that everything is given
Colour 16. This include submodels and the main model. If anything is not
set to Colour 16 it may ruin all subsequent steps.
Stage 2 - generating a depth map
As described in this article
it is possible to use POVray to generate a depth map from a POVray file
provided it does not have any textures. I have somewhat automated the
proccess by creating the file
LegoDepthMap.inc which allows us to generate the map with minimal fuss.
In order to use the above file we must convert our blanked version of the
model to povray (don’t use LGEO) and then, in the line after
#declare AMB=X;
#declare DIF=Y;
we add
#include "LegoDepthMap.inc"
Once this is done we must make sure we delete all the light sources
and leave only the camera.
We now make a note of the vector difference between the camera’s position
and look_at values.
Opening the LegoDepthMap.inc file we change
#declare DMMv = z;
to
#declare DMMv = vnormalize(CAMERA_VECTOR);
where CAMERA_VECTOR is the vector difference you have just written down.
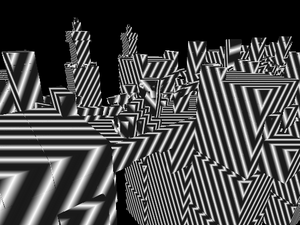
We should be able to do a trial run of the POV file now. Hopefully the
result will be a file with stripes of white and black running across it
like this.
For our next stage we increase the value of DMMs until we find one
which removes the stripes and makes the front and backmost parts of the
model dark (but not black). Typically the back will be much darker than
the front but this may not always be the case.
Once we have found this value run a calculation with anti-aliasing
switched off using -A in the command prompt box and with results being the
size of the image we wish to blur.
Copy the generated image to a safe place. It should look something like this.

Stage 3 - run the render
This stage is easy. Just render the model you are interested in
with the settings of your choice and making sure you use the same camera
you used to generate the depth map. Do not change the camera or any
part of the model.
Stage 4 - adding the blur
By now you should have a render and a depth map both of the same size.
Load the render into GIMP and add the depth map as a new layer on top
of the render.
First, hide the depth map layer and select the rendered image layer. Then
select Blur->Focus blur and wait for its window to pop up.
In the window select the “Distance Map” checkbox and set its source to
the depth map layer in the drop-down list. Click “OK” and after waiting
a while you should have an image with focal blur in the right places.
In order to fiddle with the focal blur you can use the Image->Colours->Curves
tool on the depth map layer in order to change the white and black regions.
I’ll leave this experiment to you.
Done
And that is it. The first time you use this method it will probably take
almost as long as rendering with focal blur but experience should allow
you to make much quicker use of it and save a lot of time in the long run
(particularly if you like to make ultra-realistic renders). I hope you find
this technique as useful as
I did.
|
|
Message has 2 Replies:
 | | Error: Cheap focal blur tutorial
|
| Sorry about this. I found an error in Section 2 of the tutorial. In order to use the above file we must convert our blanked version of the model to povray (do not use LGEO) and then, in the line after should be: In order to use the above file we (...) (19 years ago, 4-Jan-07, to lugnet.cad.ray, FTX)
|
4 Messages in This Thread:
  

- Entire Thread on One Page:
- Nested:
All | Brief | Compact | Dots
Linear:
All | Brief | Compact
|
|
|
|