 | | | | | | |
| |

|
10030
System / Star Wars / Ultimate Collector Series
Imperial Star Destroyer [official Lego name, abbreviated henceforth to ISD]
Natasha Stott Despoja [unofficial lugnet.loc.au name]
Ages 16+, 3104 pieces, (C) 2002 [so says the box]
Manual: 228 A3 pages, I module divided into major sub-assemblies
Price Range: AUD 499.95 from Lego Shop@Home
RATINGS (Scale: Must-Have Excellent Very-Good Good Fair Poor)
Set: Very-Good / Models: Very-Good / Playability: Poor
DECALS? A large sticker (covering multiple bricks) is used for the display
board. I did not apply it, but it is quite attractive.
SPECIAL FEATURES/COMPATIBILITY
This set makes unusual use of magnets for connecting major sections together,
probably due to the complex angles involved. This feature is both its greatest
strength (in terms of appearance of the model) and its greatest weakness (in
terms of the robustness of the structure).
SET DESCRIPTION
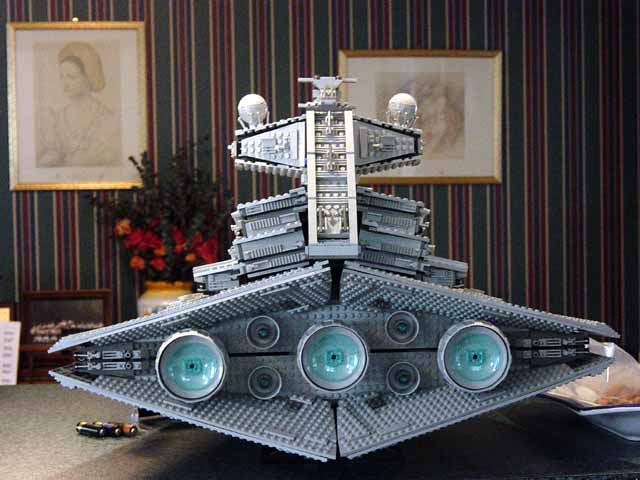
The model is a very large military-looking space ship, based on the one seen in
the opening sequence of the first Star Wars movie (Episode 4: A New Hope). The
main hull is shaped like an arrow head with a superstructure reminiscent of a
present-day warship. The model has surfaces at many different angles. Indeed,
the superstructure folds to mold itself to the shape of the arrow shape of the
hull. Certain areas of the ship bristle with exterior detailing (greebling),
some are intended as weapons but mostly the functionality is left to your
imagination.
The ISD is almost entirely light grey in colour with only very minor use of
dark grey and black for exterior detailing (greebling) and the use of
trans-light-blue for its "engine emissions". The space ship comes mounted on a
display stand which is integral to the model; you cannot remove the model from
the stand, unlike some of the other Ultimate Collector Series sets. The stand
is black with some dark grey detailing. In the internals of the set (invisible
in the finished model), the main colours are again black, dark grey, and light
grey with some red and blue (presumably to make identification of parts easier
in both the model and the instructions).
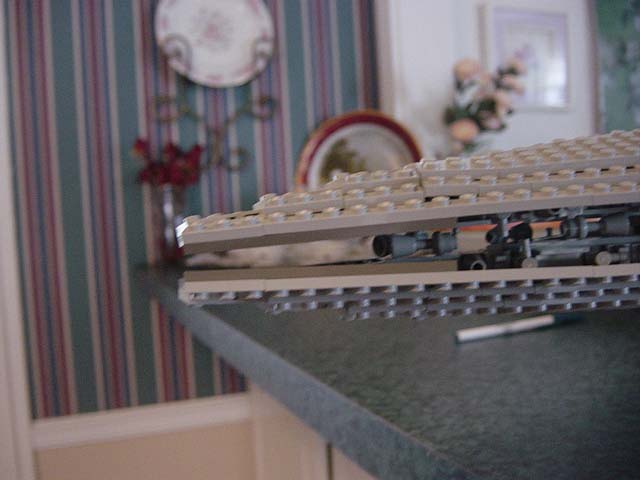
This is a very large model (perhaps Lego's largest to date). According to my
tape measure, the ISD is 100cm long, 62cm wide and 43cm high. Due to its
non-rectangular shape, it is difficult to describe it accurately using studs as
a unit of measurement. However, the hull sections (which comprise most of the
length of the model) are 117 studs long.
The set also comes with very small Rebel Blockade Runner (which it pursues in
the movie), which is presumably built to scale with the ISD. It is
predominantly white with white grey and dark red accents, and trans-orange
engine emissions. It is a SNOT (Studs Not On Top) model, so is again difficult
to measure in studs, but is about 15-16 studs long.
There are no minifigs in the set, due to its scale. Humans would be smaller
than a 1x1 plate at this scale.
SPECIAL ELEMENTS
This set will appeal to the purists. It is built from standard Lego parts [1].
There are no juniorised/specialised elements, such as the large quarter-hull
sections used in the Millennium Falcon. If there are any new shaped parts in
this set, it might be the large one-sided wheel/tyre pieces used for engine
mountings. These wheels are seen in smaller sizes in many space sets, but I am
not sure if they have previously been used in this large size. Also, I suspect
that the various round pieces used for the engine emissions may not have
previously been available in trans-light-blue.
[1] "Standard" and "juniorised/specialised" are clearly subjective issues. What
I am implying is that the parts have been used before in many other sets in
many other themes and could be re-used by many people building MOCs in many
themes. I would strongly recommend you look at the set inventory at
www.peeron.com/inv and form your own opinion.
IMPRESSION
This model looks fantastic, especially from a distance. Its size and its shape
really distinguish it from other Lego models. Lego is inherently rectangular,
but at this size, it has been possible to create a most unusual diamond-arrow
shape. When you get close up however, the rectangular nature of Lego becomes
apparent, and gaps can be seen where the angled sections come together. It is
even possible to glimpse some of the red/blue pieces in the internal structure
through these gaps (which are presumably not intended to be seen). Similarly
the greebling bristles with the menace of a mighty warship at a distance, but
up close it is just a random collection of taps and minifig binoculars.
When I first saw this set on the WWW, I remember saying "Wow, it rocks!". When
people see it on my dining room table (you can't display this set on a regular
shelf -- it's way too big), they are very impressed. It looks fantastic.
However, this set doesn't rock. Don't even think about trying to rock it. Don't
try picking it up. Don't push it a couple of inches across the table using its
stand. Don't let your cat put a paw on it. All of these have broken my model.
Any movement of the model generally results in its collapse, usually one or
more of the 4 hull sections falls off. And the feet of the display stand even
seem to be able to pop off under its own weight. This is the flimsiest model
ever. Any attempt to whoosh it will end in disaster. Once you start to put the
major sections together, I strongly recommend you build the model in the
position you will display it.
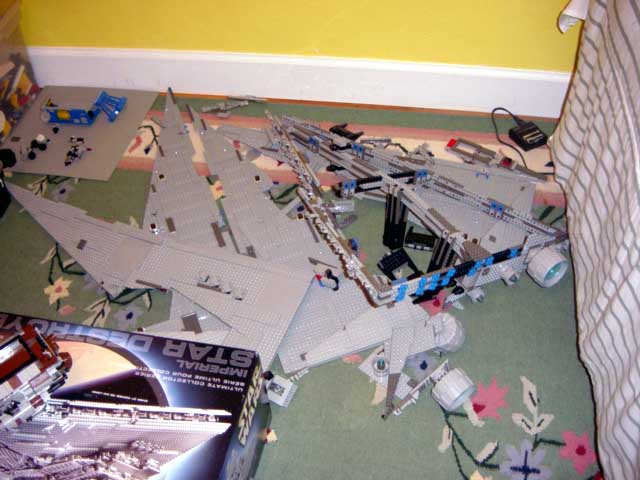
The set has a lot of parts, which are not packaged according to the
sub-assemblies, unlike some other large Lego sets, e.g. the Super Street
Sensation. I found it easiest to build by spreading everything out on the
floor. It took me days to build this set so if you have any non-Lego interests
in your life (sleep, work, family), don't expect a rapid result! It also
required a lot of cursing and swearing as sections of the model regularly came
apart as I was adding new sections due to the flimsy-ness. At one point, I gave
up for a day, being unable to attach a hull section without it collapsing the
rest of the model. I spent hours pouring over the instructions, double-checking
I had everything in the right spot, until I eventually found the small mistake
that prevented the hull section from attaching correctly. This is definitely
not a set for the younger builder! It requires careful attention at all times.
Having finally finished the set, I attempted to move it to a table. It
collapsed into a number of large chunks. I moved the chunks to the table and
rebuilt it. I then created some space on my display table and tried to move it
again, and it collapsed.
I then decided to strengthen the model, by adding extra plates on the
undersides of the hull sections (to stop them breaking into 2 or 3 pieces
constantly). I also added (and I strongly recommend this) a 1x16 black technics
beam to each side of the 2 pairs of feet on the stand (i.e. 4 beams in all),
attached with technics pins. This connects each foot to its opposing foot and
prevents the weight of the model from popping off the feet. I then attempted to
move the model again to the display table. It collapsed again, but not as badly
as before (i.e. the hull sections fell off but they didn't break into pieces).
So, I constructed the major sub-assemblies on my Lego table but did the final
assembly on the display table. Finally, success! Then I moved some other MOCs
back onto the display table (taken away to give me elbow room for the ISD
assembly) and discovered that I needed to move the ISD two inches to one side.
Carefully I reached under and put my hand onto the base of the stand and very
gently pushed it those two inches, and one of the underside hull sections gave
way at the rear. I gave up at this point, as I decided that the droop in the
back of the underside hull would not be noticed by the casual observer.
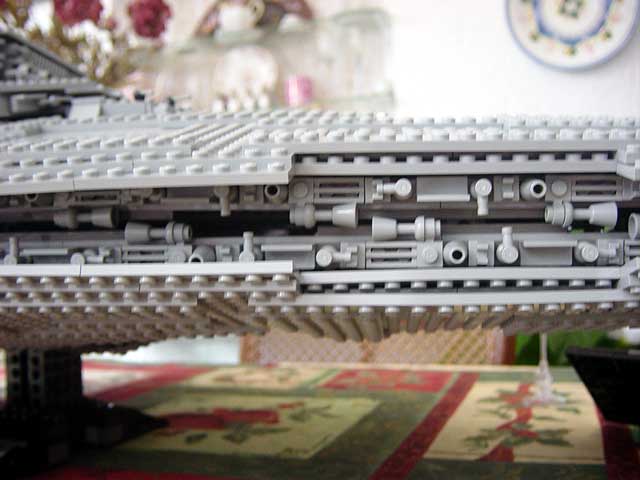
Why is this model so flimsy? Well, put simply, it consists of a large
triangular shaped infrastructure and stand, which is sturdy enough (apart from
the need to reinforce the feet as described above). However, all of the
exterior of the model is at strange angles. The 4 hull sections (2 upper, 2
undersides) are very large (110 studs) collections of plates without sufficient
reinforcing. However, even with that reinforcing, they are simply not well
attached to the infrastructure due to the angles involved. Each hull section is
held on with 3-4 magnets at the centre and 3 2x2 plate connections at the edge.
Yep, that's 12 studs and some magnets to hold on a section over 100 studs long.
The 2x2 plates are those modified plates which take an axle, which enable them
to swing into the right angle for the hull section. Unfortunately gravity tends
to let them swing stud-side down, so it is easier to attach the lower hull
sections (as you need the plates stud-side down) but more difficult to attach
the upper hull sections as you need to be holding the hull section to align the
magnets and swinging the 3 plates upright and pressing them onto the hull
section all at the same time (a job for an octopus). Oh, and while you are
doing it, you have to make sure that you don't knock off any of the greebling
with your fingers. I was forever chasing taps across the floor and reattaching
them.
Having attached the hull sections, you then take the superstructure (which is
built in a number of subsections). Each subsection of the superstructure is
built using axles or pins to enable the section to bend in two or three places.
This means that each subsection of the superstructure droops once you remove it
from the table until you place it onto the model, whereupon it miraculously
folds into the shape of the model below thanks to gravity. It's a very
impressive building technique, but again, you have the problem of having to
hold the subsection by its greebled edges while you add it onto the main model,
usually dislodging a few pieces of greebling along the way.
Note. I have a permanently broken right elbow, so have some limitations in
terms of my strength and fine motor control in that arm. It may be that some of
my problems in assembling the final model were due to my disability and that
others might not experience these problems to the same extent. I also suspect
that there is a trade-off between the need to reinforce the hull sections for
structural integrity of the hull versus the need to reduce the weight of the
model due to the magnetic couplings and feet-popping problems.
Playability Rating
Whatever my personal disability, there is no question that this model cannot be
played with. It is simply not sufficiently well-connected to survive handling,
especially not by a child. Hence I rate its playability as Low. This model is
strictly to look at, don't touch.
Model Rating
I rate the model as Very Good. For looks alone, it is probably a Must-Have and
there are lots of interesting construction techniques employed in this set that
make it an interesting experience to build. I definitely learned some new ideas
about construction both from the instructions and thinking about ways to
strengthen it. However, the structural integrity needs improvement, both in
terms of the individual sub-assemblies (most notably the hull sections) and the
method by which the hull sections are connected. The use of magnets is novel
and is an important factor in achieving the arrow-head shape, but perhaps some
ball-and-socket joints or Technics universal joints be used to replace or
reinforce these magnets for greater structural integrity? So I feel I must
reduce the overall rating of the model due to its flimsiness.
Set Rating
This is the Ultimate Grey Plates Pack, eclipsing the previous favourite, the
Sith Infiltrator. At about 16c (AUD) per piece, it is a great source of light
grey parts. But be warned, there are not a lot of regular bricks in light grey
(given the overall number of parts in the model). This set has many light-grey
plates both large and small, especially non-rectangular plates and plates with
tiled sections, and has many light grey greebling parts (taps, 1x2 grilles, 1x1
tool clips, 1x1 cones, goblets, binoculars etc). If this set contains a part
you want, then it probably has it in large quantities, but the range of parts
used may not be varied as you might think from the overall number of pieces.
Given that light grey is always a popular colour for space, castle and other
large-scale architectural themes, it seems likely that this set will be parted
out extensively via bricklink etc. However, the high price of this set will
mean that parting out will be restricted to those whose budgets can afford the
initial outlay, so it may be only a few of the large volume sellers that get
involved, and hence competition may not be as intense (and hence the prices may
not be driven as low as you might expect/hope given the high availability of
these parts). Hence my set rating was Very Good, but I would have liked to see
a greater range of parts (especially bricks) rather than such large quantities
of a smaller number of parts.
Scale
The ship is supposed to be 1 mile long, so any humanoid figures would have be
smaller than ants. There are no Lego figs that can be used with this set.
Errors
I don't recall any missing parts. There were no errors in the building
instructions, but in some steps the quantity of certain heavily-used small
parts was not stated. As it is easy to visually overlook a small part being
added to a sub-assembly that already has hundreds of parts, knowing how many
should have been used in total in each step is a useful cross-check.
Also the size of some of the sub-assemblies made it easy to misalign parts,
sometimes necessitating careful counting of the number of studs in the
instructions and on the model itself. The 4 hull sections are very similar but
not identical, so it is important to look carefully at the instructions and not
to assume that it is just the same as the previous section. I certainly made a
number of errors in building the model. In particular, there are some 1x2 dark
grey plates on the underside of the hull sections which are used to connect the
hull section to the infrastructure. Make sure these plates are in the right
position. When you only have 12 stud connections to hold on the hull section,
you cannot afford to lose any of them due to misalignment of these 1x2 plates.
Also, if you have a collapse of your model, expect these 1x2 plates to either
fall off or remain connected to the infrastructure rather than to the hull, and
use the instructions to make sure you put them back in the right place on the
hull. My feeling is that using large plates here may increase adhesion to the
hull in preference to the superstructure. The larger plates will also help
reinforce the hull sections themselves.
Extra Elements
As always, there were some leftover small elements. Curiously there was a white
cupboard door, a part not used in the set. Did it accidentally fall into the
box of parts at my house or did it come in the set?
CONCLUSION
Personally I felt some disappointment with this set. It is expensive and I was
expecting a totally awesome set about which I could write a rave review.
However, the fragility of the model and the consequence frustrations of
building it and displaying it do detract from the model. And the range of parts
isn't quite what I need for my MOCs (too many irregular-shaped plates, not
enough bricks). So, at the end of the day, I don't feel entirely happy about
the price I paid for what I got. If you have the cash spare, then it's probably
a Must-Have for your collection. However, for everyone else, you might want to
hope that it gets discounted because I don't think it's worth full RRP. You
will get better value with other sets (unless you want lots of light grey
plates). If considering this set as a gift, be warned that it is frustrating to
build and I would not recommend it for a child or anyone who isn't a seriously
enthusiastic Lego builder.
Aside. This set is rated on LUGnet at about 100, yet many of the notes mention
how the set looks and how much it is desired, suggesting to me that it may have
been rated by many people who have not actually built it. I would be interested
in knowing the ratings of those who had actually built it. Personally I'd put
it about 85.
REVIEWER INFORMATION
Review Written: 28 Dec 2002
By: Kerry Raymond, Age: 42
Favourite Themes: I buy Technics, Star Wars, Castle, Model Team, Sculptures.
For MOCs, I build large Town buildings.
--
============
Kerry Raymond
kerry@dstc.edu.au
Proud to be LUGNET Member 599
www.lugnet.com/people/members/?m=599
| | | | | | | | | | | | | | | | |
| |
|
Kerry, your review was most thorough! I do not have the time nor the
patience to type an equally thorough response. However, I respond just
hours after completing my own ISD...I must say you are being too critical of
the model's integrity.
I would prefer a couple more magnets per fuselage section, but they do the
trick sufficiently.
I had no problems with the model falling apart just by touching it.
Very minor modifications can increase the strength of the stand.
In my opinion, the set is designed for moving quite well: Just take off the
bridge tower and upper deck structure (which just sits in place, held by
gravity alone), flip up the ramp support, and the superstructure acts as a
big handle!! Not too hard considering the set's amazing size.
I never expected the ISD to be super durable...if LEGO were to beef up the
design, thereby increasing the piece count, we would all be shelling out
$350.00+ I'll do my own mods, thank you very much!
Don't take my opposition for hostility - I just don't agree with you.
-Matt
.
| | | | | | | | | | | | | | | | | | | | | |
| |
|
In lugnet.reviews, Matt Sekerak writes:
> Kerry, your review was most thorough! I do not have the time nor the
> patience to type an equally thorough response. However, I respond just
> hours after completing my own ISD...I must say you are being too critical of
> the model's integrity.
>
> I would prefer a couple more magnets per fuselage section, but they do the
> trick sufficiently.
>
> I had no problems with the model falling apart just by touching it.
>
> Very minor modifications can increase the strength of the stand.
>
> In my opinion, the set is designed for moving quite well: Just take off the
> bridge tower and upper deck structure (which just sits in place, held by
> gravity alone), flip up the ramp support, and the superstructure acts as a
> big handle!! Not too hard considering the set's amazing size.
>
> I never expected the ISD to be super durable...if LEGO were to beef up the
> design, thereby increasing the piece count, we would all be shelling out
> $350.00+ I'll do my own mods, thank you very much!
>
> Don't take my opposition for hostility - I just don't agree with you.
>
> -Matt
I must agree with Matt. I enjoyed the original review overall, but I have
"flown" the ISD around by removing the tower sections and using the internal
frame as a handle as well, and I have never had a single plate or greeblie
fall off. We're talking walking the thing from room to room in the
apartment, BTW, not just a few inches or feet. I wouldn't feet comfortable
trying to move it more than a foot or two without taking the tower off, but
so it goes.
Perhaps some of the magnets are not aligned properly? Or maybe some of the
magnets aren't at full strength? I dunno, but it sounds like some people's
magnets aren't holding as well as others. Mine are fine.
Oh, and as to the original poster's rating: I'm one of the 100s in the
rating on lugnet. Not only have I not found it that fragile, but even if
mine were as fragile as some people's, the visual impressiveness and the way
it fills a room as effectively as a great painting (IMO) with its presence
deserve higher than a 100 will allow. I don't rank based on playability that
often, though, so... if I were to take that into account, perhaps a 90. But
by my LEGO Star Wars criteria, a perfect 100 is deserved.
-Greg "Fox" Cook
| | | | | | | | | | | | | | | | | | | |
| |
|
I have to agree with you on most things. Here are some pictures I took of mine:
http://www.brickshelf.com/cgi-bin/gallery.cgi?f=30147
In lugnet.reviews, Kerry Raymond writes:
>
> SPECIAL FEATURES/COMPATIBILITY
>
> This set makes unusual use of magnets for connecting major sections together,
> probably due to the complex angles involved. This feature is both its greatest
> strength (in terms of appearance of the model) and its greatest weakness (in
> terms of the robustness of the structure).
Agreed. While the magnet idea is cool, it is simply not strong enough.
Even Though the magnets do not take all the strain, they still tend to slip
and disconnect. For the most part, I didn't have much trouble, but when I
began putting any force, the whole thing started slipping. The back
especially is too weak, only 2 magnets for all that:
http://www.brickshelf.com/gallery/tboy/ISD/21magnets.jpg
I find that the biggest problem with magnets is that they slip, and don't
actually firmly connect to one spot.
>
> SET DESCRIPTION
>
> The model is a very large military-looking space ship, based on the one seen in
> the opening sequence of the first Star Wars movie (Episode 4: A New Hope). The
> main hull is shaped like an arrow head with a superstructure reminiscent of a
> present-day warship. The model has surfaces at many different angles. Indeed,
> the superstructure folds to mold itself to the shape of the arrow shape of the
> hull. Certain areas of the ship bristle with exterior detailing (greebling),
> some are intended as weapons but mostly the functionality is left to your
> imagination.
>
> The ISD is almost entirely light grey in colour with only very minor use of
> dark grey and black for exterior detailing (greebling) and the use of
> trans-light-blue for its "engine emissions". The space ship comes mounted on a
> display stand which is integral to the model; you cannot remove the model from
> the stand, unlike some of the other Ultimate Collector Series sets. The stand
> is black with some dark grey detailing. In the internals of the set (invisible
> in the finished model), the main colours are again black, dark grey, and light
> grey with some red and blue (presumably to make identification of parts easier
> in both the model and the instructions).
I have some gripes witht the red and blue... all those technic pegs, so
useful for SNOT- but blue? It's hard to make them look nice if they're not
very hidden. Blue can be a garish color.
>
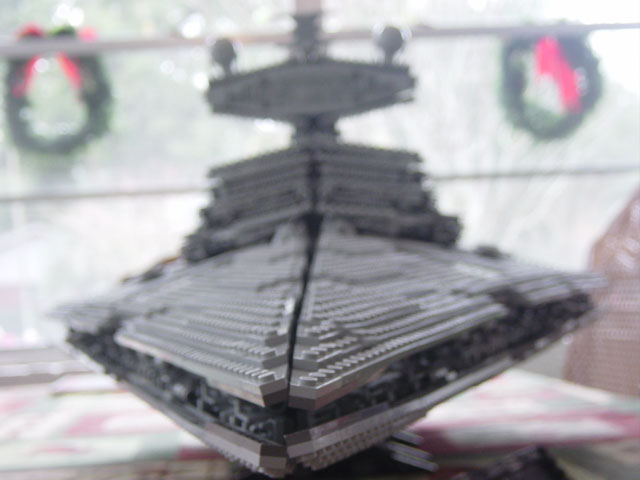
> This is a very large model (perhaps Lego's largest to date).
According to Lego, it is. It IS really huge.
http://www.brickshelf.com/gallery/tboy/ISD/15front.jpg
>
> The set also comes with very small Rebel Blockade Runner (which it pursues in
> the movie), which is presumably built to scale with the ISD. It is
> predominantly white with white grey and dark red accents, and trans-orange
> engine emissions. It is a SNOT (Studs Not On Top) model, so is again difficult
> to measure in studs, but is about 15-16 studs long.
I find the Rebel Blockade Runner well made, although the tan plate is really
annoying. The only tan piece in the whole set looks really weird.
>
> There are no minifigs in the set, due to its scale. Humans would be smaller
> than a 1x1 plate at this scale.
ALOT smaller.
>
> SPECIAL ELEMENTS
>
> This set will appeal to the purists. It is built from standard Lego parts [1].
> There are no juniorised/specialised elements, such as the large quarter-hull
> sections used in the Millennium Falcon. If there are any new shaped parts in
> this set, it might be the large one-sided wheel/tyre pieces used for engine
> mountings. These wheels are seen in smaller sizes in many space sets, but I am
> not sure if they have previously been used in this large size. Also, I suspect
> that the various round pieces used for the engine emissions may not have
> previously been available in trans-light-blue.
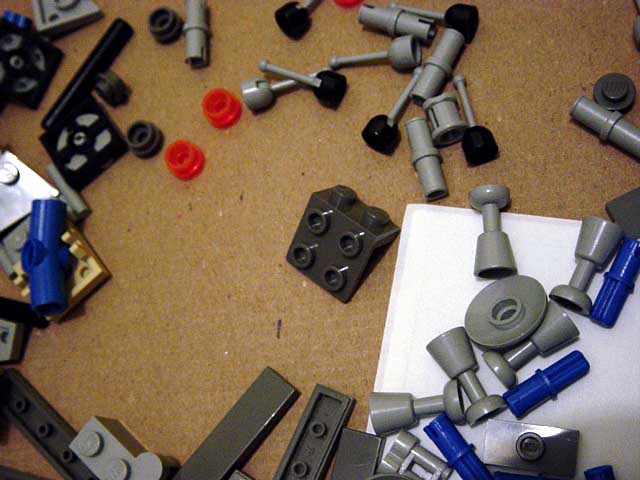
There are in fact quite a few new/interesting pieces.
There is a large number of 2x3 and 2x4 grey wedge plates, very useful
pieces. The big wheels are actually from the 1980's Mega Core Magnetizer.
http://guide.lugnet.com/set/6989
There is a new bracket piece, similar to the old 'car headlights' bracket
but 2x2 instead of 1X4.
http://www.brickshelf.com/gallery/tboy/ISD/4newbracket.jpg
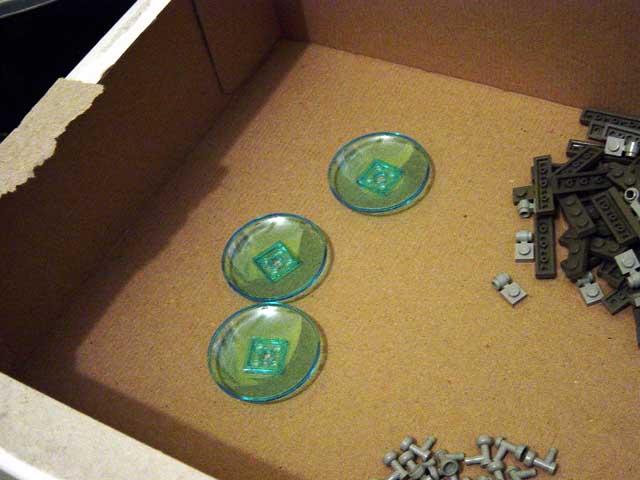
And the new trans-blue 6x6 dish is also new.
http://www.brickshelf.com/gallery/tboy/ISD/3new6x6dish.jpg
<snip>
>
> IMPRESSION
>
> This model looks fantastic, especially from a distance. Its size and its shape
> really distinguish it from other Lego models. Lego is inherently rectangular,
> but at this size, it has been possible to create a most unusual diamond-arrow
> shape. When you get close up however, the rectangular nature of Lego becomes
> apparent, and gaps can be seen where the angled sections come together. It is
> even possible to glimpse some of the red/blue pieces in the internal structure
> through these gaps (which are presumably not intended to be seen). Similarly
> the greebling bristles with the menace of a mighty warship at a distance, but
> up close it is just a random collection of taps and minifig binoculars.
>
> When I first saw this set on the WWW, I remember saying "Wow, it rocks!". When
> people see it on my dining room table (you can't display this set on a regular
> shelf -- it's way too big), they are very impressed. It looks fantastic.
The set looks very good, but on closer expection there are flaws.
There are a lot of holes that you don't see in the official photos, or holes
that are a lot bigger.
http://www.brickshelf.com/gallery/tboy/ISD/20frontgap.jpg
http://www.brickshelf.com/gallery/tboy/ISD/16stress.jpg
http://www.brickshelf.com/gallery/tboy/ISD/13completeback.jpg
I think the last might be caused by slipping magnets.
The center is also of prime concern to me. The whole thing is SO heavy that
the beams actually bend slightly under the stress.
>
> However, this set doesn't rock. Don't even think about trying to rock it. Don't
> try picking it up. Don't push it a couple of inches across the table using its
> stand. Don't let your cat put a paw on it. All of these have broken my model.
> Any movement of the model generally results in its collapse, usually one or
> more of the 4 hull sections falls off. And the feet of the display stand even
> seem to be able to pop off under its own weight. This is the flimsiest model
> ever. Any attempt to whoosh it will end in disaster. Once you start to put the
> major sections together, I strongly recommend you build the model in the
> position you will display it.
As Matt said, take the superstructure off, lift the supporting beam, and
carry it holding the main beam.
>
> The set has a lot of parts, which are not packaged according to the
> sub-assemblies, unlike some other large Lego sets, e.g. the Super Street
> Sensation. I found it easiest to build by spreading everything out on the
> floor. It took me days to build this set so if you have any non-Lego interests
> in your life (sleep, work, family), don't expect a rapid result! It also
> required a lot of cursing and swearing as sections of the model regularly came
> apart as I was adding new sections due to the flimsy-ness. At one point, I gave
> up for a day, being unable to attach a hull section without it collapsing the
> rest of the model. I spent hours pouring over the instructions, double-checking
> I had everything in the right spot, until I eventually found the small mistake
> that prevented the hull section from attaching correctly. This is definitely
> not a set for the younger builder! It requires careful attention at all times.
> Having finally finished the set, I attempted to move it to a table. It
> collapsed into a number of large chunks. I moved the chunks to the table and
> rebuilt it. I then created some space on my display table and tried to move it
> again, and it collapsed.
>
> I then decided to strengthen the model, by adding extra plates on the
> undersides of the hull sections (to stop them breaking into 2 or 3 pieces
> constantly). I also added (and I strongly recommend this) a 1x16 black technics
> beam to each side of the 2 pairs of feet on the stand (i.e. 4 beams in all),
> attached with technics pins. This connects each foot to its opposing foot and
> prevents the weight of the model from popping off the feet. I then attempted to
> move the model again to the display table. It collapsed again, but not as badly
> as before (i.e. the hull sections fell off but they didn't break into pieces).
> So, I constructed the major sub-assemblies on my Lego table but did the final
> assembly on the display table. Finally, success! Then I moved some other MOCs
> back onto the display table (taken away to give me elbow room for the ISD
> assembly) and discovered that I needed to move the ISD two inches to one side.
> Carefully I reached under and put my hand onto the base of the stand and very
> gently pushed it those two inches, and one of the underside hull sections gave
> way at the rear. I gave up at this point, as I decided that the droop in the
> back of the underside hull would not be noticed by the casual observer.
I found that the whole structure needs more reinforcing. Particullarly when
you attatch the connecting pieces to connect the doubles of the main
triangle. The sides would bend apart under stress, and the best way to fix
that would be to add more of those plate/two bricks/two plates/two
bricks/plate connectors.
I moved the model around 4 times, and it never broke- until the last time.
When I placed it on my Lego room's floor, one of the feet fell off. No
problem, thought I. I lifted two of the wing pieces so I could hold the
stand beams more firmly, then I tried to stick the foot on. Instead of
sticking, the whole frame broke right in the middle.
http://www.brickshelf.com/gallery/tboy/ISD/23badstructure.jpg
The biggest connecting arm just pulled the beams apart right on top of the
stand, then when the beams disconnected, the left greeblie seam split as well.
> Why is this model so flimsy? Well, put simply, it consists of a large
> triangular shaped infrastructure and stand, which is sturdy enough (apart from
> the need to reinforce the feet as described above). However, all of the
> exterior of the model is at strange angles. The 4 hull sections (2 upper, 2
> undersides) are very large (110 studs) collections of plates without sufficient
> reinforcing. However, even with that reinforcing, they are simply not well
> attached to the infrastructure due to the angles involved. Each hull section is
> held on with 3-4 magnets at the centre and 3 2x2 plate connections at the edge.
> Yep, that's 12 studs and some magnets to hold on a section over 100 studs long.
> The 2x2 plates are those modified plates which take an axle, which enable them
> to swing into the right angle for the hull section. Unfortunately gravity tends
> to let them swing stud-side down, so it is easier to attach the lower hull
> sections (as you need the plates stud-side down) but more difficult to attach
> the upper hull sections as you need to be holding the hull section to align the
> magnets and swinging the 3 plates upright and pressing them onto the hull
> section all at the same time (a job for an octopus). Oh, and while you are
> doing it, you have to make sure that you don't knock off any of the greebling
> with your fingers. I was forever chasing taps across the floor and reattaching
> them.
Agreed. I was panicking at the end when I noticed some pieces were missing.
Lo and behold! There was a whole pile of fallen greeblies right under the
hull on the floor.
>
> Having attached the hull sections, you then take the superstructure (which is
> built in a number of subsections). Each subsection of the superstructure is
> built using axles or pins to enable the section to bend in two or three places.
> This means that each subsection of the superstructure droops once you remove it
> from the table until you place it onto the model, whereupon it miraculously
> folds into the shape of the model below thanks to gravity. It's a very
> impressive building technique, but again, you have the problem of having to
> hold the subsection by its greebled edges while you add it onto the main model,
> usually dislodging a few pieces of greebling along the way.
>
> Note. I have a permanently broken right elbow, so have some limitations in
> terms of my strength and fine motor control in that arm. It may be that some of
> my problems in assembling the final model were due to my disability and that
> others might not experience these problems to the same extent. I also suspect
> that there is a trade-off between the need to reinforce the hull sections for
> structural integrity of the hull versus the need to reduce the weight of the
> model due to the magnetic couplings and feet-popping problems.
>
> Playability Rating
>
> Whatever my personal disability, there is no question that this model cannot be
> played with. It is simply not sufficiently well-connected to survive handling,
> especially not by a child. Hence I rate its playability as Low. This model is
> strictly to look at, don't touch.
Very true.
>
> Model Rating
>
> I rate the model as Very Good. For looks alone, it is probably a Must-Have and
> there are lots of interesting construction techniques employed in this set that
> make it an interesting experience to build. I definitely learned some new ideas
> about construction both from the instructions and thinking about ways to
> strengthen it. However, the structural integrity needs improvement, both in
> terms of the individual sub-assemblies (most notably the hull sections) and the
> method by which the hull sections are connected. The use of magnets is novel
> and is an important factor in achieving the arrow-head shape, but perhaps some
> ball-and-socket joints or Technics universal joints be used to replace or
> reinforce these magnets for greater structural integrity? So I feel I must
> reduce the overall rating of the model due to its flimsiness.
Ball-and-socket connectors- that would really make this set shine.
>
> Set Rating
>
> This is the Ultimate Grey Plates Pack, eclipsing the previous favourite, the
> Sith Infiltrator. At about 16c (AUD) per piece, it is a great source of light
> grey parts. But be warned, there are not a lot of regular bricks in light grey
> (given the overall number of parts in the model). This set has many light-grey
> plates both large and small, especially non-rectangular plates and plates with
> tiled sections, and has many light grey greebling parts (taps, 1x2 grilles, 1x1
> tool clips, 1x1 cones, goblets, binoculars etc). If this set contains a part
> you want, then it probably has it in large quantities, but the range of parts
> used may not be varied as you might think from the overall number of pieces.
> Given that light grey is always a popular colour for space, castle and other
> large-scale architectural themes, it seems likely that this set will be parted
> out extensively via bricklink etc. However, the high price of this set will
> mean that parting out will be restricted to those whose budgets can afford the
> initial outlay, so it may be only a few of the large volume sellers that get
> involved, and hence competition may not be as intense (and hence the prices may
> not be driven as low as you might expect/hope given the high availability of
> these parts). Hence my set rating was Very Good, but I would have liked to see
> a greater range of parts (especially bricks) rather than such large quantities
> of a smaller number of parts.
Personally, I liked the content.
Being a .Spacer, I use gray ALOT. I have enough bricks, but plates are
really sparing, as so are little greeblie bits like taps, tiles, and 1x1
clip plates with the stud clip- always a useful piece. This set helped in
that respect.
>
> Scale
>
> The ship is supposed to be 1 mile long, so any humanoid figures would have be
> smaller than ants. There are no Lego figs that can be used with this set.
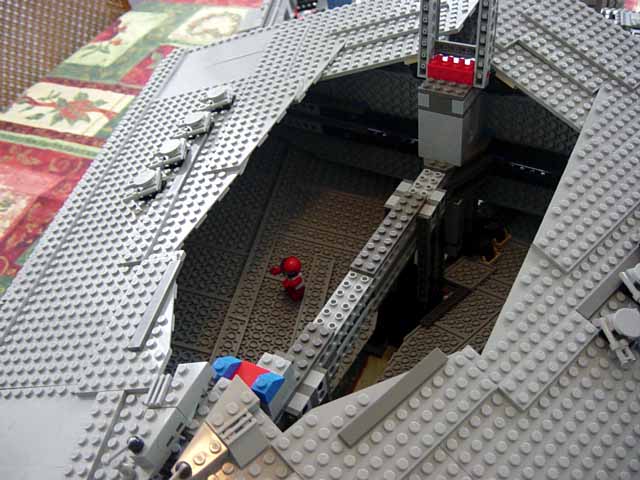
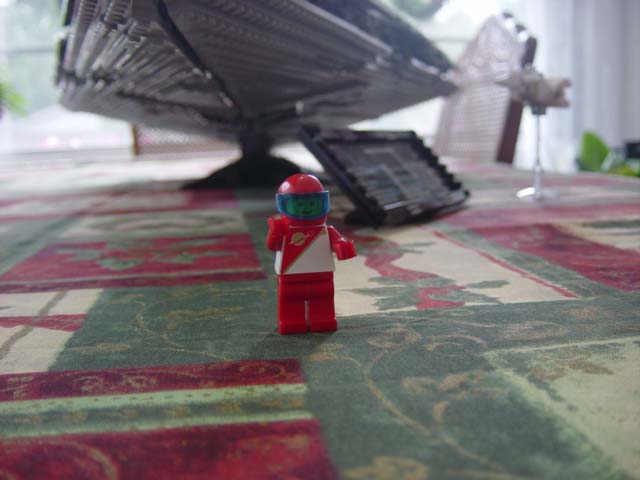
But the figs are still pretty tiny even in real life! :)
http://www.brickshelf.com/gallery/tboy/ISD/18spottheminifig.jpg
http://www.brickshelf.com/gallery/tboy/ISD/22minifig.jpg
>
> Errors
>
> I don't recall any missing parts. There were no errors in the building
> instructions, but in some steps the quantity of certain heavily-used small
> parts was not stated. As it is easy to visually overlook a small part being
> added to a sub-assembly that already has hundreds of parts, knowing how many
> should have been used in total in each step is a useful cross-check.
>
> Also the size of some of the sub-assemblies made it easy to misalign parts,
> sometimes necessitating careful counting of the number of studs in the
> instructions and on the model itself. The 4 hull sections are very similar but
> not identical, so it is important to look carefully at the instructions and not
> to assume that it is just the same as the previous section. I certainly made a
> number of errors in building the model. In particular, there are some 1x2 dark
> grey plates on the underside of the hull sections which are used to connect the
> hull section to the infrastructure. Make sure these plates are in the right
> position. When you only have 12 stud connections to hold on the hull section,
> you cannot afford to lose any of them due to misalignment of these 1x2 plates.
> Also, if you have a collapse of your model, expect these 1x2 plates to either
> fall off or remain connected to the infrastructure rather than to the hull, and
> use the instructions to make sure you put them back in the right place on the
> hull. My feeling is that using large plates here may increase adhesion to the
> hull in preference to the superstructure. The larger plates will also help
> reinforce the hull sections themselves.
I didn't have any problems with either missing pieces or instructions EXCEPT
for the part in which you attatch the bridge to the superstructure. The
perspective was very confusing.
>
> Extra Elements
>
> As always, there were some leftover small elements. Curiously there was a white
> cupboard door, a part not used in the set. Did it accidentally fall into the
> box of parts at my house or did it come in the set?
Must be your part bin... I didn't get any special extras.
>
> CONCLUSION
>
> Personally I felt some disappointment with this set. It is expensive and I was
> expecting a totally awesome set about which I could write a rave review.
> However, the fragility of the model and the consequence frustrations of
> building it and displaying it do detract from the model. And the range of parts
> isn't quite what I need for my MOCs (too many irregular-shaped plates, not
> enough bricks). So, at the end of the day, I don't feel entirely happy about
> the price I paid for what I got. If you have the cash spare, then it's probably
> a Must-Have for your collection. However, for everyone else, you might want to
> hope that it gets discounted because I don't think it's worth full RRP. You
> will get better value with other sets (unless you want lots of light grey
> plates).
Which applies to practiclly any .Spacer and Star Wars fan.
Good review!
-JHK
| | | | | | | | | | | | | | | | | | |
| |
|
Hey Kerry,
While I'll agree that the model is not easily handled and cannot be swooshed
around, I wasn't disappointed by this at all. In fact, I expected it.
Given it's scale, the model would have to be glued together to be sturdy
enough (horrors!). Besides, Star Destroyers don't swoosh, they glide slowly
but surely towards you with the inexorable power of evil. TIE fighter's do
the swooshing! :-)
The sheer size and weight of the model does affect it in some ways. I found
that the four hull sections cannot maintain a straight line along the
outside edge, and that there are some gaps here and there. However, I found
this interesing in that it reveals some of the limitations of lego bricks in
acheiving such complex shapes at this scale. You can even see this in some
of the box photos, and I was glad that TLG seemed to not be attempting to
hide this fact. I'm sure that these minor design flaws could have been
corrected, but that would have probably driven the price of the set too
high.
I think my only real complaint was that it was impossible to make enough
space for all the pieces on my table. I had to leave quite a few bags
opened but not emptied in the box because there was nowhere to dump them
without using up my workspace. The sub-assemblies are HUGE, and take up a
lot of room!
Dave
| | | | | | | | | | | | | | | | | | |
| |
|
"Kerry Raymond" <kerry@dstc.edu.au> wrote in message
news:H7szBH.CAG@lugnet.com...
> 10030
> System / Star Wars / Ultimate Collector Series
> Imperial Star Destroyer [official Lego name, abbreviated henceforth to
ISD]
<snip>
> SPECIAL FEATURES/COMPATIBILITY
> This set makes unusual use of magnets for connecting major sections • together,
> probably due to the complex angles involved. This feature is both its • greatest
> strength (in terms of appearance of the model) and its greatest weakness • (in
> terms of the robustness of the structure).
I agree about the unusual use of the magnets. They are a bit weak, yes. But
If you take in count that this model is only for display, not to carry
around and "flying" whit it, its sturdy enough.
But if I whould have designed this set I would not have used magnets in the
bottom part. I would rather used some links of some kind. That part could be
improved a lot.
> IMPRESSION • <snip>
> Note. I have a permanently broken right elbow, so have some limitations in
> terms of my strength and fine motor control in that arm. It may be that • some of
> my problems in assembling the final model were due to my disability and • that
> others might not experience these problems to the same extent. I also • suspect
> that there is a trade-off between the need to reinforce the hull sections • for
> structural integrity of the hull versus the need to reduce the weight of • the
> model due to the magnetic couplings and feet-popping problems.
I found that I have to make sure that all plates was put together real good,
on a flat surface like my table. And I even hammered a little with my hand
on the plates to ensure that they was firmly attached. Else the 4 big plates
(bottom and top coverplates) was either easy to break or they was not
straight or totaly flat and looked funny and bulky when you looked at the
model in front. Since the plates are so big, any loose connection in only
one of the plates would easy bee seen.
> Playability Rating
>
> Whatever my personal disability, there is no question that this model • cannot be
> played with. It is simply not sufficiently well-connected to survive • handling,
> especially not by a child. Hence I rate its playability as Low. This model • is
> strictly to look at, don't touch.
And it is TOO heavy to be played with anyway :)
> Model Rating
>
> I rate the model as Very Good. For looks alone, it is probably a Must-Have • and
> there are lots of interesting construction techniques employed in this set • that
> make it an interesting experience to build. I definitely learned some new • ideas
> about construction both from the instructions and thinking about ways to
> strengthen it. However, the structural integrity needs improvement, both • in
> terms of the individual sub-assemblies (most notably the hull sections) • and the
> method by which the hull sections are connected. The use of magnets is • novel
> and is an important factor in achieving the arrow-head shape, but perhaps • some
> ball-and-socket joints or Technics universal joints be used to replace or
> reinforce these magnets for greater structural integrity? So I feel I must
> reduce the overall rating of the model due to its flimsiness.
I dont totaly agree with you there. I think the set is not flimsy, since its
not suposed to be a object that you should fly around in your house with (or
space). It is ment to be a display items only. Why would they make the stand
on the model attached to the model if it was ment to be played with like
that?
> Set Rating
>
> This is the Ultimate Grey Plates Pack, eclipsing the previous favourite, • the
> Sith Infiltrator. At about 16c (AUD) per piece, it is a great source of • light
> grey parts. But be warned, there are not a lot of regular bricks in light • grey
> (given the overall number of parts in the model). This set has many • light-grey
> plates both large and small, especially non-rectangular plates and plates • with
> tiled sections, and has many light grey greebling parts (taps, 1x2 • grilles, 1x1
> tool clips, 1x1 cones, goblets, binoculars etc). If this set contains a • part
> you want, then it probably has it in large quantities, but the range of • parts
> used may not be varied as you might think from the overall number of • pieces.
> Given that light grey is always a popular colour for space, castle and • other
> large-scale architectural themes, it seems likely that this set will be • parted
> out extensively via bricklink etc. However, the high price of this set • will
> mean that parting out will be restricted to those whose budgets can afford • the
> initial outlay, so it may be only a few of the large volume sellers that • get
> involved, and hence competition may not be as intense (and hence the • prices may
> not be driven as low as you might expect/hope given the high availability • of
> these parts). Hence my set rating was Very Good, but I would have liked to • see
> a greater range of parts (especially bricks) rather than such large • quantities
> of a smaller number of parts.
I bought the set of three reasons:
1. The huge amount of grey and "normal" pieces.
2. The fact that this is the largest set avaiable.
3. The good look of the model.
But have to say that #1 was the main reason for buying.
The other two was only a "cool" factor :)
> Errors
>
> I don't recall any missing parts. There were no errors in the building
> instructions, but in some steps the quantity of certain heavily-used small
> parts was not stated. As it is easy to visually overlook a small part • being
> added to a sub-assembly that already has hundreds of parts, knowing how • many
> should have been used in total in each step is a useful cross-check.
>
> Also the size of some of the sub-assemblies made it easy to misalign • parts,
> sometimes necessitating careful counting of the number of studs in the
> instructions and on the model itself. The 4 hull sections are very similar • but
> not identical, so it is important to look carefully at the instructions • and not
> to assume that it is just the same as the previous section. I certainly • made a
> number of errors in building the model. In particular, there are some 1x2 • dark
> grey plates on the underside of the hull sections which are used to • connect the
> hull section to the infrastructure. Make sure these plates are in the • right
> position. When you only have 12 stud connections to hold on the hull • section,
> you cannot afford to lose any of them due to misalignment of these 1x2 • plates.
> Also, if you have a collapse of your model, expect these 1x2 plates to • either
> fall off or remain connected to the infrastructure rather than to the • hull, and
> use the instructions to make sure you put them back in the right place on • the
> hull. My feeling is that using large plates here may increase adhesion to • the
> hull in preference to the superstructure. The larger plates will also help
> reinforce the hull sections themselves.
I could not find any errors in the designs either. Only some missing part
quantity in the instruction as you mentioned. But that only did the model a
bit more difficult to build, and I like that :)
> Extra Elements
> As always, there were some leftover small elements. Curiously there was a • white
> cupboard door, a part not used in the set. Did it accidentally fall into • the
> box of parts at my house or did it come in the set?
I did not have any special leftovers.
> CONCLUSION
>
> Personally I felt some disappointment with this set. It is expensive and I • was
> expecting a totally awesome set about which I could write a rave review.
> However, the fragility of the model and the consequence frustrations of
> building it and displaying it do detract from the model. And the range of • parts
> isn't quite what I need for my MOCs (too many irregular-shaped plates, not
> enough bricks). So, at the end of the day, I don't feel entirely happy • about
> the price I paid for what I got. If you have the cash spare, then it's • probably
> a Must-Have for your collection. However, for everyone else, you might • want to
> hope that it gets discounted because I don't think it's worth full RRP. • You
> will get better value with other sets (unless you want lots of light grey
> plates). If considering this set as a gift, be warned that it is • frustrating to
> build and I would not recommend it for a child or anyone who isn't a • seriously
> enthusiastic Lego builder.
>
> Aside. This set is rated on LUGnet at about 100, yet many of the notes • mention
> how the set looks and how much it is desired, suggesting to me that it may • have
> been rated by many people who have not actually built it. I would be • interested
> in knowing the ratings of those who had actually built it. Personally I'd • put
> it about 85.
I would give it a 95. Only would give it som negative points for its use of
"repetiviness" (the same use of elements on its "sensor array" along the
sides). They could made it a bit diffrent along the sides and not used the
same placing of the parts over and over and over again.
And it also got some negative points for its weak stand, that almost cant
hold the model up.
But now I dont know what to do with the model. I dont want to take it apart
because it looks so nice. And its size is amazing. But the size is a problem
for me since I dont have that much room to have a big model like that just
standing there on my small livingroom table. I use that table for building
Lego and now 1/3 of my table is ocupied with the model :)
I think I will ask some of the Lego stores here in my town if they would
like to have a display model like this for a period. (until I need the parts
for another model). The set is not avaiable in the shops here in Norway....
> REVIEWER INFORMATION
> Review Written: 28 Dec 2002
> By: Kerry Raymond, Age: 42
> Favourite Themes: I buy Technics, Star Wars, Castle, Model Team, • Sculptures.
> For MOCs, I build large Town buildings.
Øyvind Steinnes (Norway), age 34
Favorite Themes: Technics (this was my first Star Wars model even if I'm not
a big Star Wars fan)
http://www.brickshelf.com/cgi-bin/gallery.cgi?m=Phoenix
PS: picture of my ISD can be found at
http://www.brickshelf.com/cgi-bin/gallery.cgi?f=29432 , there you can see
some of the asembly stages and some details of the ship.
| | | | | | | | | | | | | | | | | | | | |
One other point I forgot to mention in my original review ...
The massive instruction book (228 A3 pages) is too heavy for its style of
binding and the covers quickly detached from the rest of the book as I started
to turn through the pages.
And there is no way I will be fitting this set of instructions into the ring
binders I normally use (A4 sized) :-)
Kerry
| | | | | | | | | | | | | | | | | | | | | | |
In lugnet.reviews, Kerry Raymond writes:
> One other point I forgot to mention in my original review ...
>
> The massive instruction book (228 A3 pages) is too heavy for its style of
> binding and the covers quickly detached from the rest of the book as I started
> to turn through the pages.
Agreed wholeheartedly, as I opened the box and removed the instructions I
found that just travelling to my house had caused a severe rip in the spine.
There was a rip on the front cover in the bottom left hand corner.
However, after assembly, things like the instructions left my mind as I
stared at what I had built.
-Kevin
>
> And there is no way I will be fitting this set of instructions into the ring
> binders I normally use (A4 sized) :-)
>
> Kerry
| | | | | | | | | | | | | | | | | |
In lugnet.reviews, Kerry Raymond writes:
> Errors
>
> I don't recall any missing parts. There were no errors in the building
> instructions, but in some steps the quantity of certain heavily-used small
> parts was not stated. As it is easy to visually overlook a small part being
> added to a sub-assembly that already has hundreds of parts, knowing how many
> should have been used in total in each step is a useful cross-check.
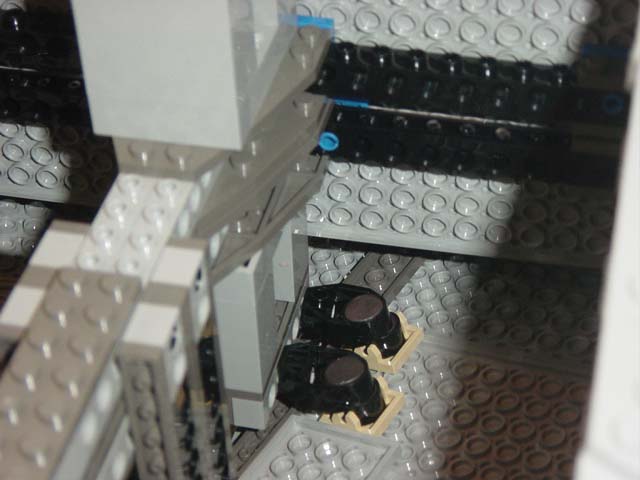
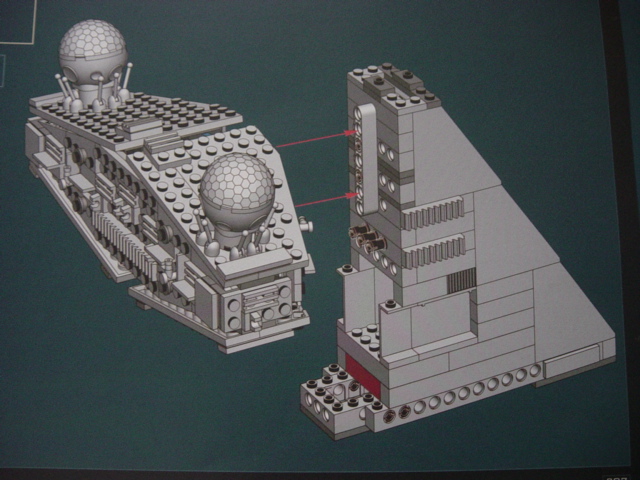
I'm not sure if it was only me, but I noticed some discrepancies with the
deflector shield domes ("golf balls"). Most steps show one dome flush
against the edge of the plate it sits on, and the other dome 1 stud away
from the edge. Can someone else verify this?
At the end I found myself short 1 2x8 lt grey plate. But I probably used
one where I wasn't supposed to...
-Bryan
| | | | | | | | | | | | | | | | | |
In lugnet.reviews, Bryan Wong writes:
> I'm not sure if it was only me, but I noticed some discrepancies with the
> deflector shield domes ("golf balls"). Most steps show one dome flush
> against the edge of the plate it sits on, and the other dome 1 stud away
> from the edge. Can someone else verify this?
Ah, yes, now I remember. The rest of the manual all showed one dome 1 stud
away, but on the pictures both are flush. I just put mine flush, I think
it's a typo. I snapped a picture with my camera of it:
http://www.brickshelf.com/gallery/tboy/Misc/strangegolfballs.jpg
-JHK
| | | | | | | | | | | | | | | | | | | |
| |
|
"Bryan Wong" <green_paper@hotmail.com> wrote in message
news:H7wB7H.GFs@lugnet.com...
> In lugnet.reviews, Kerry Raymond writes:
> > Errors
> >
> > I don't recall any missing parts. There were no errors in the building
> > instructions, but in some steps the quantity of certain heavily-used • small
> > parts was not stated. As it is easy to visually overlook a small part • being
> > added to a sub-assembly that already has hundreds of parts, knowing how • many
> > should have been used in total in each step is a useful cross-check.
>
> I'm not sure if it was only me, but I noticed some discrepancies with the
> deflector shield domes ("golf balls"). Most steps show one dome flush
> against the edge of the plate it sits on, and the other dome 1 stud away
> from the edge. Can someone else verify this?
>
> At the end I found myself short 1 2x8 lt grey plate. But I probably used
> one where I wasn't supposed to...
>
> -Bryan
Uh? Was it a typo?
I thought i should be like that and built one flush against the edge and the
other 1 stud away. When building I thougth it was a bit strange, but not
everyting on the ship was mirrored from one side to the other...
Have to check the manual again and see if I can see where it SHOULD be :)
Regards
Øyvind Steinnes
| | | | | | | | | | | | | | | | | | | | | |
| |
|
In lugnet.reviews, Øyvind Steinnes writes:
>
> "Bryan Wong" <green_paper@hotmail.com> wrote in message
> news:H7wB7H.GFs@lugnet.com...
> > In lugnet.reviews, Kerry Raymond writes:
> > > Errors
> > >
> > > I don't recall any missing parts. There were no errors in the building
> > > instructions, but in some steps the quantity of certain heavily-used • small
> > > parts was not stated. As it is easy to visually overlook a small part • being
> > > added to a sub-assembly that already has hundreds of parts, knowing how • many
> > > should have been used in total in each step is a useful cross-check.
> >
> > I'm not sure if it was only me, but I noticed some discrepancies with the
> > deflector shield domes ("golf balls"). Most steps show one dome flush
> > against the edge of the plate it sits on, and the other dome 1 stud away
> > from the edge. Can someone else verify this?
> >
> > At the end I found myself short 1 2x8 lt grey plate. But I probably used
> > one where I wasn't supposed to...
> >
> > -Bryan
>
> Uh? Was it a typo?
> I thought i should be like that and built one flush against the edge and the
> other 1 stud away. When building I thougth it was a bit strange, but not
> everyting on the ship was mirrored from one side to the other...
> Have to check the manual again and see if I can see where it SHOULD be :)
>
> Regards
> Øyvind Steinnes
The only things on the ship that aren't perfectly mirrored are the detail
10x1 plates around the large trench, and the 10x2 detail plates on the
tower. And those are only assymmetrical because they themselves are mirror
images from the left to right. Eh.
-Greg "Fox" Cook
| | | | | | | | | | | | | | | | | | | |
| |
|
In lugnet.reviews, Bryan Wong writes:
> In lugnet.reviews, Kerry Raymond writes:
> > Errors
> >
> > I don't recall any missing parts. There were no errors in the building
> > instructions, but in some steps the quantity of certain heavily-used small
> > parts was not stated. As it is easy to visually overlook a small part being
> > added to a sub-assembly that already has hundreds of parts, knowing how many
> > should have been used in total in each step is a useful cross-check.
>
> I'm not sure if it was only me, but I noticed some discrepancies with the
> deflector shield domes ("golf balls"). Most steps show one dome flush
> against the edge of the plate it sits on, and the other dome 1 stud away
> from the edge. Can someone else verify this?
Yes, I noticed that error. I had to refer to another picture of the bridge
on the box to see if they were supposed to be flush or 1 stud away, and they
were supposed to be flush.
> At the end I found myself short 1 2x8 lt grey plate. But I probably used
> one where I wasn't supposed to...
Probably so. Or at least, I hope so. Otherwise you got stiffed one piece.
-Greg "Fox" Cook
| | | | | | |