 | | | | | | |
| |

|
Brickshelf link
I like mosaics. I like SNOT. The unholy combination of these two resulted in
what I’ll call mixed mosaics. (anyone willing to devise a witty acronym is free
to do so.)
Anyway. The most basic mosaics are made with the studs pointing outward, using
1x1 bricks as the smallest units. This gives nice square mosaic tiles, which
makes it easy for computer programs to make templates for mosaics. There are
also side mosaics, where the sides of 1x1 plates are used. These are smaller
than the outwardstuddded mosaics, but have the disadvantage of not being square.
Also, they allow more detail in one direction. Unless you turn several parts if
those mosaics sideways...

It’s actually quite simple. Using photoshop, I create two mosaics, horizontally
and vertically. After that, I let the computer calculate for every 2x2 stud
square which mosaic is most suited; horizontal or vertical.
So, with some clever fiddling one is able to create smoother, more detailed
mosaics than previously possible. To test this theory, I created this mosaic:
I indicated which parts go which direction. The 2x2 pixel plates are plain
colors, so they can be either horizonally or vertically constructed, depending
on what’s most convenient.
If I find the time and a camera I’ll construct this one for real, but for now
I’ll be building with theoretical bricks. At the moment I’m typing a photoshop
walkthrough, which I hope to finish tonight.
And, as always, please let me know what you think.
| | | | | | | | | | | | | | | | |
| |
|
Okay, I just finished typing the tutorial. It’s long. The first mosaics will be
easy, but things will get comlicated in the end. If you have questions, I’m sure
you’ll know where to post them.
These tutorials will be text-ONLY. It assumes you have some very basic knowledge
of photoshop. Every step is described in great detail, so If you have no idea
what I mean, look it up in the help function of photoshop. Press F1 in PS to
bring it up. Enter a search term (“pencil tool” for example) and you’re on your
way. I used Photoshop CS2, but any version from 6.0 will do fine. You can even
download a trial version from Adobe’s site ( www.adobe.com ) which propably has
all the functionality you need.
By the end of the tutorial you’ll have to work on your own quite a bit. I’ll be
giving less detailed instructions, and you propably will have a hard time
following everything if you don’t have some basic photoshop skills. Just thought
I’d give you the heads-up.
I’ll explain three types of mosaics. Studs out, side mosaic and mixed. Each
section repeats techniques found in previous sections, so it’s recommended that
you read (and do!) it all and not skip ahead.
Starting out: Palette creation
Since there’s an almost unlimited number of pixel colors, but only a limited
number of Lego bricks, you’re going to have to create a palette of colors you
are going to use.
To do that, you’re going to have to create a new document in Photoshop, and use
the pencil tool to fill at least one pixel of the image with one of the colors
you have.
Say, you only want to use black, white, red, blue and yellow bricks in your
mosaic. So, you open a new document in photoshop, and fill it with black. Use
the pencil tool to add (at least) one white pixel, one red pixel and so forth.
When all the colors you’re going to use are in the image, go to file>save for
web. Set the file format to GIF. When you’re starting out, it’s propably still
set to JPG. When you look at the color table, you’ll see the colors of your
image neatly in squares. Verify that there’s ONLY the colors there you need, and
save the image as “palette.gif” of something like that.
Creating a studs-out mosaic.
Every image on a computer is built with tiny squares called “pixels”. Photoshop
works with pixels that are square. The top of an 1x1x1 lego brick is also
square. Convenient, isn’t it?
You propably already have a picture you want to use. It’s propably also way to
big. You’ll need to decide the dimensions of your mosaic. If you want to make a
mosaic of 30 by 50 studs (or bricks), you need to resize your image to 30x50
pixels. You may also want to run filter>sharpen>sharpen afterwards.
When your image is the size you need it to be, click file>save for web again.
Once again, make sure the filesize is GIF. Go look for the color table. Most
likely, there are hunderds of squares in the color table, indicating which pixel
colors are in use. You CAN delete every superfluous color from the palette and
add only the colors you need, or you can tell photoshop to use the colors in the
palette.gif we saved previously. Next to the color table you’ll see a circular
button with a triangle on it. If you click it, you should see the option “load
color table”. Look up your palette.gif and use that. If your PS doesn’t have
this option, you’ll have to modify the palette yourself.
You’ll want to zoom in a lot, since pixels are very small. If everything went
well, you’ll see your picture in the colors you need. You can play around with
the settings, too. Pay attention to the “Dither” option. It has several
settings:
No dither: Every pixels is changed to the color that is closest to a color in
the palette. Diffusion: Pixels are changed to a color in the palette, but
there’s some variation. When viewed from afar, the colors look more genuine.
(for example: if you have a field of mixed yellow and red pixels, they will be
seen as orange when viewed from a distance. Pattern: Same thing as “diffusion”,
but more accurate. Diffusion: Same thing as “diffusion”, but less accurate.
Dithering makes colors look better from far away, but that also means that
you’ll get many pixels that are 1x1 bricks. Without dithering you’ll have bigger
colorspaces, which means you can also use your bigger bricks to fill the mosaic.
Just play around with the settings until you have something you like, and save
the file.
Resizing and adding a grid
Now, too keep track of the individual bricks, you’ll propably want to make a
grid to see the bricks on. Makes it easier to count and all. Resizing would also
be a good idea.
Open your saved *.gif file.Click select>all and edit>copy. Close the *.gif
Create a new PS document with a transparent background. PS will automatically
make sure it’s the same size as the image you’ve just copied, so that’s a good
thing. Click edit>paste.
Click image>image size. Set the width and heighth to 1000%, which means that
the image will be magnified to 10x it’s original size. Every pixel will become
be a cluster of 10x10 pixels.
Photoshop has a really good resizing algorythm, which is aimed at resizing
photos. We won’t be needing that. To turn it off, set the ‘resampling method’ in
the image resize dialog to “nearest neighbour”, then click OK to apply the
transformation.
Now for the grid. Leave the current document open, and create a new document
with a transparent canvas. The size should be 10 x 10 pixels. Grab the pencil
tool and draw an outline of a 10x10 box on the canvas. (this means: black 10x10
box with a 8x8 gap in the middle.) The middle should be transparent, which is
indicated by the grey-white checkerbox pattern.
This outline will be placed on every 10x10 pixel box in the original image.
Click select>all which selects the entire canvas. Click edit>define pattern
You’ll be asked to name the pattern. Press OK. Close the 10x10 image, as we
won’t be needing it anymore.
Return to the master image with the 10x10 blocks. Create a new layer ABOVE the
colors layer. Grab the flood fill tool, and in the settings of the flood fill
tool, indicate that you’ll fill with a pattern. Pick the pattern we’ve just
created and fill the new layer with the pattern.
Well, there you go. A nice patttern for your building pleasure.
Upping the stakes: Creating a side-mosaic.
The top of a 1x1 brick is good for creating mosaics, but it’s a bit big, so you
won’t be able to see much detail. However, you can also use the sides of lego
bricks and plates to create mosaics. The side of a 1x1 plate is much smaller.
The disadvantage is that these sides are not square, so you’ll have to go
through a bit more trouble in preparing your image.
Intro: Dimensions!
Most experienced lego builders will know all of this already, but I’ll go over
it once again just in case. Everyone will have found out that if you stack three
plates on top of eachother, it’ll be exactly as high as your typical brick.
However, if we stick 5 plates on top of eachother, it’ll be exactly as high as
two studs (bricks) wide. This is massively useful, but for now we’ll just have
to remember that the sides of a 1x1 plate are 2 to 5 (heighth to width)
Since Photoshop doesn’t support pixels in this size, we’ll say that a brickside
onscreen will be 5 pixels wide and 2 pixels high.
Grab an image you want to mosaicize and resize it. As we’ve just established
that the side of a brick is 5 pixels, you can use that to find out how big your
mosaic will be. To make things easier for me, ensure that your canvas is set in
multiples of 10. You can see (and fix) this by clicking image>canvas size. So,
if you’ve got a picture shrunk to 87x53 pixels, change the canvas size to 80x50
pixels to drop the clutter.
When your picture is right, click select>all and copy it. Paste it in a new
document. Make sure the canvas size is the same, and write the dimensions down
somewhere. Click image>image size and set the resampling method to ‘nearest
neighbour’. Uncheck the box that says ‘constrain proportions’. Resize the image
horizontally to 200%, and vertically to 500% (2 by 5, sound familiar?)
Now run filter>pixelate>mosaic at a setting of 10 pixels. Resize the image
back to it’s original size. Make sure that the resampling method is still set to
‘nearest neighbour’.
Grab the zoom tool and examine the image up close. 2x5 blocks. Wonderful. You
can now repeat the file>save for web procedure to export the image with a
proper palette, just like the studs out mosaic. You’ll only be able to use “no
dithering”, though.
(!) ADVAAAAAAAAAAANCED (!)
If you still want to use things like dithering in you mosaic, proceed as
follows: Resize your image to 20% horizontally, and 50% vertically. All 2x5
blocks will now be resized to 1x1 pixels. Use ‘save for web’ to apply all the
dithering options you need. When you’re done, save the file and reopen it.
Resize to 500% horizontally and 200% vertically, and you’re back to the 2x5
plate size. Add a grid if you feel like it, and you’re done.
Mixed mosaics
As we’ve already seen, 5 plates high equals 2 studs wide. So, if you’d put 4 1x2
plates on top of eachother and a 1x2 tile on top of that, you’ll have a square.
In a side-mosaic every 2x2 studs space will hold 2 stacks of 5 plates This
square will be 10x10 pixels in photoshop. It’s possible to turn this square 90
degrees (counter)clockwise.
The idea behind the mixed mosaic is that every 10x10 pixel area of a picture is
best described by either a normally-oriented 2x5 stack, or one on it’s side.
To create one, grab a good picture, and make sure the canvas width&heighth are
multiples of 10. You’ll need to create TWO side mosaics of this picture; one
normal, and one with the picture turned 90 degrees. Just follow the same
directions for the side mosaic, and make sure you keep the original image
somewhere. After you get the two mosaics, turn the rotated mosaic back to it’s
original orientation. Paste everything in a new document, so you get:
1: The original image
2: The right-side-up mosaic
3: The sideways mosaic
All these layers should be the same size.
Now, we’ve got two mosaics in two directions. Now we need to decide where to use
which mosaic. For this, we turn to Photoshop’s blending modes
(!) Trivia: Blending modes (!)
Hopefully you already know how layers work. If you have no clue about blending
modes; it’s how photoshop treats a layer on top of any other layers. You can set
blending modes in the layer palette. Look for a dropdown box set to ‘normal’
there’s plenty of options here, try not to get intimidated.. I’ll try to explain
blending modes to the folks who have no clue. The rest of you can skip this
segment. For simplicity’s sake, let’s assume there’s one layer on top of a
background. In ‘normal’ mode, the layer will simply show up. When there’s a
visible pixel on the top layer, photoshop will ignore all the pixel information
in the background layer. ‘cuz hey, the layer’s on top of the background layer so
you can’t see the background. But if you take the blending mode ‘lighten’, for
example, photoshop will compare pixels of the layer and the background. If the
layer pixel is brightest, that one will show up. If the background layer pixel
is brightest, that one will show up. (now guess what the blending mode ‘darken’
does.)
There are plenty of blending modes which do plenty of different things. ‘screen’
adds the brightness of the background and layer pixels together, while multiply
does the opposite.
But the blending mode we’ll be using is “difference”. This is how it works:
If a pixel on the layer is the same as the background below it, the end result
will be a pure black pixel. If there’s a slight difference between the pixels,
the end resulting pixel will be slightly lighter. The bigger the difference, the
brighter the pixel will be.
So, what we’re going to do is putting the original image on the bottom, and one
of the mosaics on top. Set the mosaic’s blending mode to “difference”. Select
the canvas CTRL-A and click edit>copy merged, edit>paste. This layer is a
map of the differences between the original and the mosaic. Dark patches are
similar, while bright spots indicate parts that are different. Desaturate the
layer using CTRL-SHIFT-U. (Or use image>adjust>hue/saturation, works too.)
Make this layer invisble for now, and do the same with the other mosaic, so
you’ll have two maps for both mosaics. Run filter>pixelate>mosaic on both. Use
a setting of 10 pixels.
Now, you’ve got the difference maps, that come in 10x10 pixel squares. These
will indicate which mosaic piece (horizontal or vertical) goes where. As
brightness level indicates the level of difference, the square with the lowest
brightness level wins. Now, you could go and compare each and every square on
your own, but that would be boring. Instead, make a duplicate of the top
‘difference map’ layer. Set the blending mode of the top duplicate to
‘difference’, and set the blending mode of the bottom duplicate to ‘lighten’.
(!) Explanation on what the hell we’re doing (!)
By now, you’ll propably have a very dark document, with some dark gray squares.
The bottom ‘difference map’ layer (the one you didn’t duplicate and which is
still set to ‘normal’) is just sitting there. The layer on top of that (the one
set to lighten) will ONLY show where it’s lighter than the bottom map. The layer
set to difference on top of that will be black where the layer of ‘lighten’
shines through since there’s no difference, but where the bottom layer shines
through there will be some small difference, so these squares will be lighter.
So, the black squares in the resulting image mean that the the duplicated
layer’s squares are brightest there.
If you couldn’t quite follow that, don’t worry.
Press D on your keyboard, which will reset the colors you’re painting with. The
main color will be black. Click select>color range and set the fuzziness to 0.
Which means only the pure black squares will be selected.
You now have a selection of the 2x2 squares that are better suited than the
original orientation. Wether this selection is for the horizontal mosaic or the
vertical mosaic I don’t know, you’ll have to decide for yourself. Keep the
selection active, and make every layer invisible except for the horizontal and
vertical mosaic layers. Select the top layer of those two, and press ‘delete’.
There’s a 50% chance you deleted the right part. If the act of deleting the
selection doesn’t improve the picture, you’ve deleted the wrong part. Undo
(CTRL-Z), click select>inverse to invert the selection and try deleting the
selection from the top layer again. When in doubt, retry.
And this is where you’re on your own. Once again, you can export using the
palette. You can create a grid. Go nuts.
I realize that this tutorial, especially at the end, is quite bare-bones. This
is since I don’t have the patience to retype every step over and over again.
Nevertheless, I hope you found it useful in some way. If you have any comments,
questions or suggestions, let me know and I’ll see what I can do.
I you want some hands-on help, or you need me to create plans for your mosaic
you can try contacting me on MSN at chokingonsplintersahotmail.com . I’m not
online all that often, though. If you don’t have the patience for me to turn up,
posting here or mailing me is a better idea.
| | | | | | | | | | | | | | | | | | | | |
In lugnet.build.mosaic, Peer Kreuger wrote:
| |
Okay, I just finished typing the tutorial. It’s long. The first mosaics will
be easy, but things will get comlicated in the end. If you have questions,
I’m sure you’ll know where to post them.
|
snip
Peer,
Thanks for creating this tutorial, the technique is very interesting. The
tutorial covers well the one step from your original post that I wasn’t sure of,
letting the computer decide which orientation is best for each section. You
came up with a pretty clever way of doing this, which didn’t require any
programming. It might be cool to record a photoshop action of the entire
process, so that anyone could do it with just a few clicks. Thanks again!
Daniel Rubin
Lego Ambassador
| | | | | | | | | | | | | | | | | | |
In lugnet.announce.moc, Peer Kreuger wrote:
Wow. ...wow. WOW!
I’ve never even thought of doing such a thing! And I wouldn’t have guessed what
a huge difference it would make in the implied resolution.
| |
If I find the time and a camera I’ll construct this one for real,
|
Hoh, yes! You MUST! Are you sure it’s possible?
| |
At the moment I’m typing a photoshop walkthrough,
|
Ah! You rock. It makes me so happy when people take the time to share their
discoveries/techniques so that the whole community can benefit. And I’m sure
it’s taken you a substantial amount of time, even just in what you show us here
about how the process works. I believe you have a knack for visual
communication, what with showing us the solid color version! That really helps
me to see what’s going on. That view reminds me very much of the processes used
in image compression. Like, how there’s more information to record where there
are tight curves and such.
I’d be curious to see data compiled on many, many such mosaics, particularly
their compared inventories, the numbers of change in orientation, some cost
analysis perhaps? Heh, and the time it takes to assemble them - I think I’d go
insane! (I’m no snot expert by any means.)
| |
And, as always, please let me know what you think.
|
As I said, “Wow.”
I can’t wait to see more. I hope I’ll get to see one assembled up close at
BrickFest!
-Suz
| | | | | | | | | | | | | | | | | | | | |
In lugnet.build.mosaic, Suzanne Rich wrote:
| |
Wow. ...wow. WOW!
I’ve never even thought of doing such a thing! And I wouldn’t have guessed
what a huge difference it would make in the implied resolution.
|
To be honest, I was surprised as well! The only drawback I’ve noticed so far is
that drawings are more effective than photos, since they have larger areas of
uniform colors.
| |
| |
If I find the time and a camera I’ll construct this one for real,
|
Hoh, yes! You MUST! Are you sure it’s possible?
|
Mathematically, it all fits. The only thing that’s stopping me is the massive
amounts of 1x1 plates I’ll be needing. Maybe some bricklinking is in order.
| |
It makes me so happy when people take the time to share their
discoveries/techniques so that the whole community can benefit.
|
Well, There’s two reasons there. For one, I like explaining things. Somehow it
makes me feel smart :) For another, I like to inspire other (mosaic) builders,
and receive some kind of credit if someone would take this technique and run
with it. (Eric Harshbarger, I’m looking at you ;)
| |
I believe you have a knack for visual
communication, what with showing us the solid color version! That really
helps me to see what’s going on.
|
Like I said, I enjoy explaining. It can be very frustrating when you see a cool
build on brickshelf, but there’s no way to see how it’s done.
| |
I’d be curious to see data compiled on many, many such mosaics, particularly
their compared inventories, the numbers of change in orientation, some cost
analysis perhaps?
|
Well... there’s one problem there. I’m absolutely no good with programming, and
I create my mosaics in photoshop. There’s no way to get a piececount from the
resulting image. Based on canvas size (32 by 50 studs) you’d need 16000 1x1
tiles, but that’s way too much. Many clusters of tiles can be replaced by bigger
parts. I gave that a shot:

Here’s the
image split in horizontal and vertical parts
And here’s the image
split in colors. Is anyone here able to guess the price based on this? I
wouldn’t have a clue.
| |
I can’t wait to see more. I hope I’ll get to see one assembled up close at
BrickFest!
|
Well, as I’m a European builder, I won’t be able to make it personally. You’re
going to have to rely on other builders, or the smaaaall chance that I’ll be
able to build one in time and mail it there.
Thanks for your reply... oh, and also for alol the other folks here: I’m able to
create building plans for anyone who wants to try and build one. Just send me an
email and I’ll see what I can do.
| | | | | | | | | | | | | | | | | | | | | | |
In lugnet.build.mosaic, Peer Kreuger wrote:
| |
| |
It makes me so happy when people take the time to share their
discoveries/techniques so that the whole community can benefit.
|
Well, There’s two reasons there. For one, I like explaining things. Somehow
it makes me feel smart :) For another, I like to inspire other (mosaic)
builders, and receive some kind of credit if someone would take this
technique and run with it. (Eric Harshbarger, I’m looking at you ;)
|
Well... I did my own interesting style (I called it just a SNOT-mosaic) back in
Dec 2002:
http://www.ericharshbarger.org/lego/madhatter.html
It does not “mix” studs out and sideways bricks... but the technique is similar
to what you’ve proposed here. You are correct, the techniques do work best on
drawings not photographs.
Given the thousands of tiles it took to make my Mad Hatter mosaic, I don’t think
I’ll be doing another such personal project for a while (though I think I
completed it in about a week).
Eric
| | | | | | | | | | | | | | | | | | |
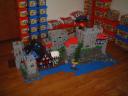
Wow, that is very impressive! I will begin searching for castle applications
;)
God Bless,
Nathan
Visit my brickshelf gallery:
 (pic=link)
| | | | | | | | | | | | | | | | | |
WOW, Brilliant!
e
| | | | | | | | | | | | | | | | | |
In lugnet.announce.moc, Peer Kreuger wrote:
| |
I like mosaics. I like SNOT. The unholy combination of these two resulted in
what I’ll call mixed mosaics. (anyone willing to devise a witty acronym is
free to do so.)
|
Wow this is REALLY REALLY cool. I’m in the process of building a mosaic using
plates on their sides (studs pointing upwards). I’m not done yet, but the
pattern on the plan I created (using Bricksaic) could be better. It’s not
Bricksaic’s fault - the pattern I’m trying to re-create is probably too complex
for the small area I’m putting it in, so your technique may help improve detail.
My immediate question is though, can your mosaic be built for real without using
glue? I haven’t visualized the building process, but you might need to get very
creative when matching up the vertical units with the horizontal ones...
I’ll definitely give you credit if/when I get this thing to work.
-Bryan
| | | | | | | | | | | | | | | | | | | | |
| |
Wow this is REALLY REALLY cool. I’m in the process of building a mosaic
using plates on their sides (studs pointing upwards). I’m not done yet, but
the pattern on the plan I created (using Bricksaic) could be better. It’s
not Bricksaic’s fault - the pattern I’m trying to re-create is probably too
complex for the small area I’m putting it in, so your technique may help
improve detail.
|
If you’d mail me the picture I may be able to give some pointers or create a
plan for you... unless you want to do it all by yourself, of course.
| |
My immediate question is though, can your mosaic be built for real without
using glue? I haven’t visualized the building process, but you might need to
get very creative when matching up the vertical units with the horizontal
ones...
|
Well, the thing is... the whole construction doesn’t need to be 1 brick thin...
there’s plenty of space to construct behind the mosaic.
I’ve made a picture with some examples:
3 ways to snot
From left to right:
1: using 1x1 bricks with hole. Those things aren’t useable in every situation,
and I may ditch them alltogether.
2: Simple, and using only one headlight brick.
3: This may be a bit hard to visualize. The idea is that I would build
the two
differently-oriented mosaics in such a way that they would hold themselves
together without requiring additional parts. This is only a simplified example,
but I think it’s possible to create a mosaic out of two parts that snugly fit
together this way.
| | | | | | | | | | | | | | | | | | | | | | |
In lugnet.build.mosaic, Peer Kreuger wrote:
> If you'd mail me the picture I may be able to give some pointers or create a
> plan for you... unless you want to do it all by yourself, of course.
Thanks, email sent!
> Well, the thing is... the whole construction doesn't need to be 1 brick
> thin... there's plenty of space to construct {behind} the mosaic.
>
> I've made a picture with some examples:
>
> <http://www.brickshelf.com/gallery/mahjqa/Mosaics/snotways.gif 3 ways to
> snot>
That's true (mosaic can be more than 1 brick deep). And judging from your
picture, SNOT comes very natural to you! :) Being mostly a castle builder
myself, I just don't have very much experience with SNOT...
Example 3 looks very complex if you were to make an entire mosaic like that!
Thanks,
-Bryan
| | | | | | | | | | | | | | | | | | | | | | |
| |
| |
If you’d mail me the picture I may be able to give some pointers or create a
plan for you... unless you want to do it all by yourself, of course.
|
Thanks, email sent!
|
For anyone who wonders how it turned out:
| | | | | | | | | | | | | | | | | |
In lugnet.announce.moc, Peer Kreuger wrote:
| |
I like mosaics. I like SNOT. The unholy combination of these two resulted in
what I’ll call mixed mosaics. (anyone willing to devise a witty acronym is
free to do so.)
|
Peer, that is fantastic. I actually thought about this two years ago -- but I’m
not a mosaic builder, and I need to use my computer programming time for things
other than play. You actually did it, and you did a fantastic job of it!
Congratulations!
Ladasky Home Solar, Inc.: blowing sunshine up your power grid since March 24,
2005. Fiat lux!
Uptime: 402 days
| | Downtime: none
| | kWh generated: 7043
| | kWh consumed: 7650
|
| | | | | | |